
Account Security: 2FA, Passwords & Email Verification
Secure your Scope Wiser account: verify your email, enable two-factor authentication, change your password, and use the logged-in device and login activity logs.
This page covers the three settings that protect your login — email verification, two-factor authentication and your password — and where to check who is logged in.
They live in two places. Your personal security — email verification, two-factor authentication, your password — sits on the Account page, reached from the profile menu. Control Panel → Settings & Integration holds the workspace-level security records: sessions, login history and deletion logs.
Start from the dashboard prompts
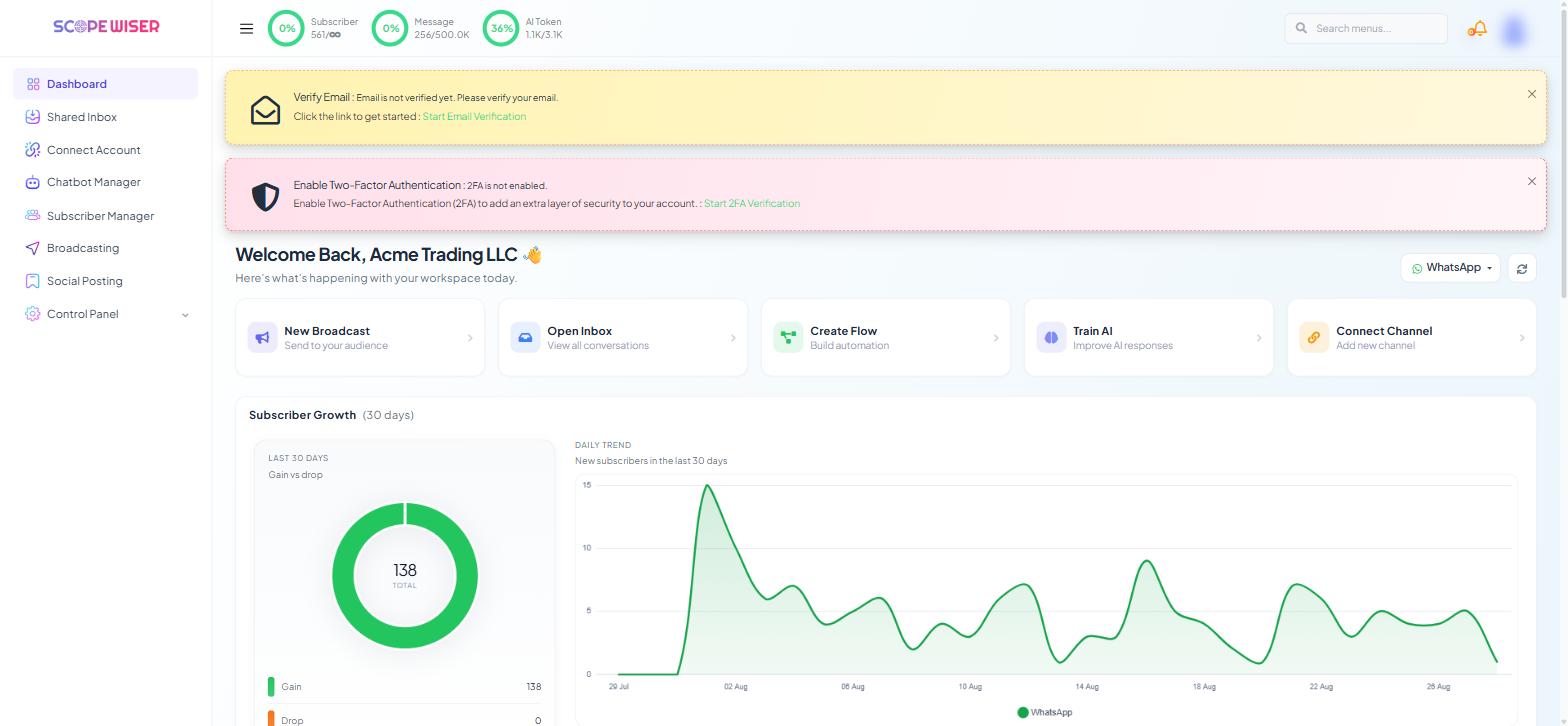
Log in and look at the top of the Dashboard. Until both jobs are done, two banners sit there:
"Verify Email: Email is not verified yet. Please verify your email. Click the link to get started" — with Start Email Verification.
"Enable Two-Factor Authentication: 2FA is not enabled. Enable Two-Factor Authentication (2FA) to add an extra layer of security to your account." — with Start 2FA Verification.
They disappear once each is complete, so an empty dashboard header is a quick check that the basics are in place.
Verify your email
Do this first, because password resets and account alerts go to this address.
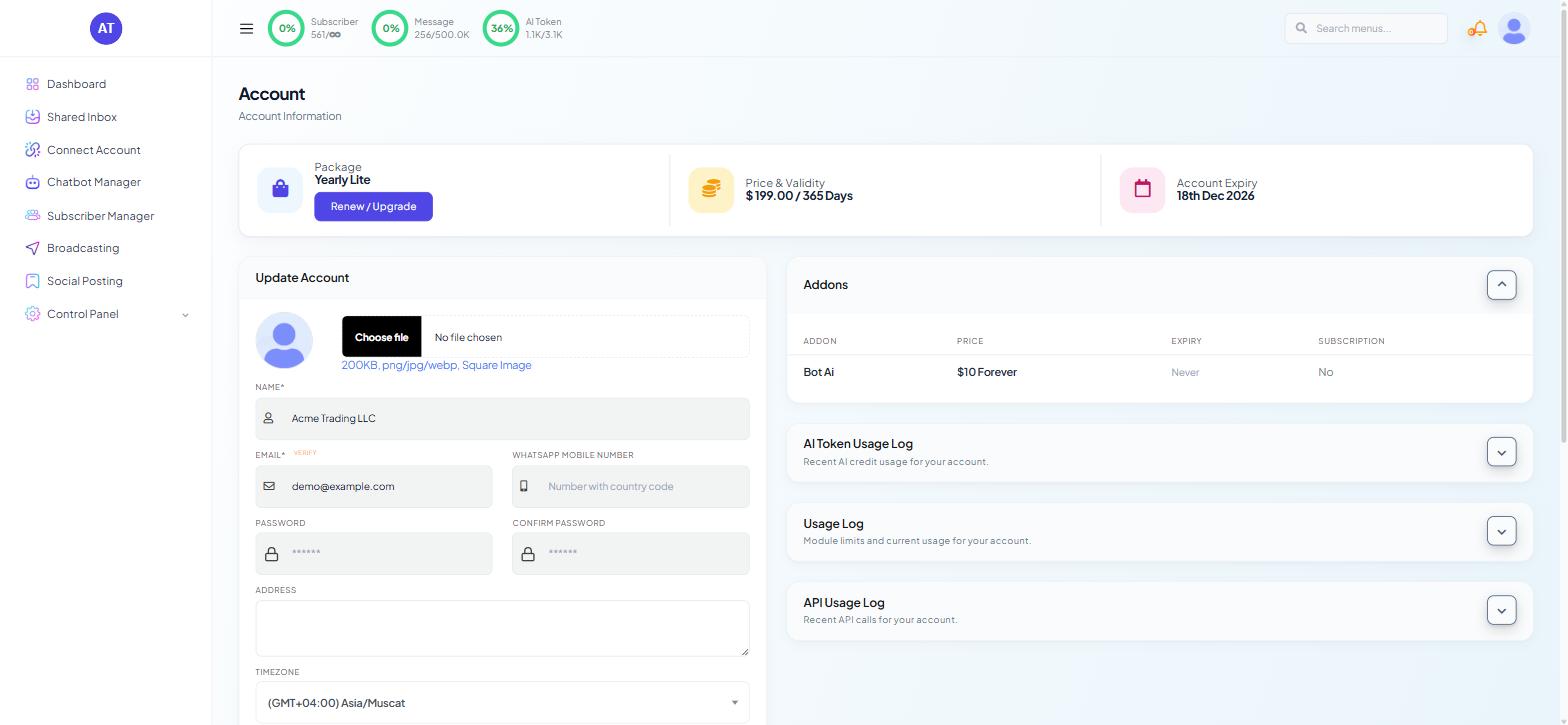
Click Start Email Verification on the dashboard banner. You can also start from the Account page: open the profile menu, choose Account, and use the VERIFY link beside the EMAIL * field on the Update Account form.
Open the verification email Scope Wiser sends and click the link inside.
If it does not arrive within a few minutes:
Check spam and junk. Automated verification mail lands there routinely.
Check the address is right. Correct it on the Update Account form, click Update, then request verification again.
Check with your IT team if you use a corporate domain with strict filtering.
Request a fresh link if the one you have has expired — old links stop working.
Enable two-factor authentication
Two-factor authentication is the single change that most reduces your risk: a stolen or reused password is no longer enough on its own.
You need an authenticator app on your phone first — Google Authenticator, Authy, Microsoft Authenticator or any other app that generates six-digit codes. Install it before you start.
Open the profile menu and choose Account. Near the top of the page sits the 2FA card, reading "2FA Disabled — Two-Factor Authentication is not enabled on your account."
Click Enable 2FA (the dashboard banner's Start 2FA Verification leads to the same place).
Scan the code with your authenticator app, enter the 6-digit code, and save the recovery codes.
Keep the recovery codes somewhere other than the phone that runs the authenticator app — a password manager or a printed copy. Set 2FA up on a phone you will still have next year; moving it to a new phone means disabling it on the old one first.
Change your password
The password fields are part of the ordinary account form rather than a separate screen.
Open the profile menu and choose Account.
Scroll the Update Account form to PASSWORD and CONFIRM PASSWORD — both show
******as placeholders.Type the new password into both.
Scroll down and click Update. Nothing saves until you do.
Leave both fields untouched when you are only changing something else on the form, such as your timezone.
Use a long password you do not use anywhere else; a password manager can create one.
If you have forgotten your password, use Forgot Password? on the login page — the reset goes to your verified email address.
Change it immediately if you suspect it has leaked, and when someone with access leaves — or better, give people their own logins so leaving is a toggle rather than a password reset for everyone. Adding Team Members & Access Control covers that.
Check who is logged in
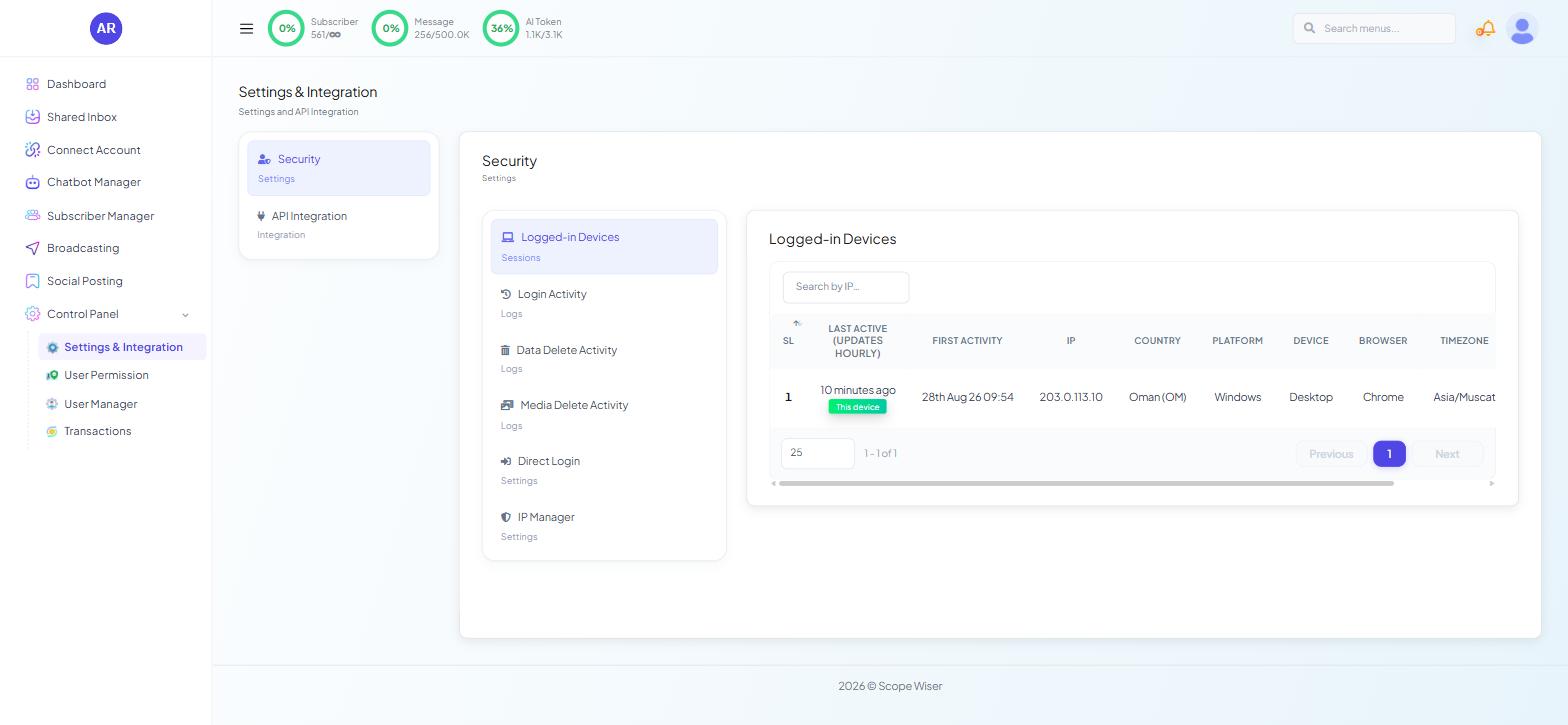
Go to Control Panel → Settings & Integration. Reaching it needs CONTROL PANEL - SETTINGS on your role, so if there is no Control Panel entry in your sidebar, ask whoever administers the workspace. The page splits into two groups, Security and API Integration. Under Security:
Logged-in Devices (Sessions)
Login Activity (Logs)
Data Delete Activity (Logs)
Media Delete Activity (Logs)
Direct Login (Settings)
IP Manager (Settings)
Logged-in Devices is the one to read first. It lists every active session with SL, LAST ACTIVE (UPDATES HOURLY), FIRST ACTIVITY, IP, COUNTRY, PLATFORM, DEVICE, BROWSER and TIMEZONE. The session you are using carries a This device badge.
Look for any country, browser or device you do not recognise. LAST ACTIVE updates hourly.
Login Activity gives you the history behind that snapshot — useful when you want to know whether an unfamiliar session was a one-off or a pattern. Data Delete Activity and Media Delete Activity record what was removed and when, which is the log you want after someone reports that something has gone missing.
A ten-minute routine, once a quarter
Confirm both dashboard banners are gone.
Read Logged-in Devices and account for every row.
Skim Login Activity for anything outside your working hours or country.
Check User Manager for accounts belonging to people who have left.
Change your password if anything above looked wrong.
If a session looks unfamiliar, change your password first, then enable or re-enable 2FA, then work through the logs — in that order.
What to do next
Adding Team Members & Access Control is the natural next step: individual logins with scoped permissions do more for your security than any single setting on this page.