
Build Your First Chatbot in 5 Minutes
A quickstart for any channel: create a keyword reply, set the trigger keywords, add a message, add buttons and test it on WhatsApp, Messenger, Instagram or Webchat.
This guide builds a bot that answers one keyword with one reply. The steps are the same on WhatsApp, Facebook Messenger, Instagram and Webchat; where a step differs by channel, the channel is named.
Before you start
You need one connected channel and nothing else — no developer, no code, no template approval. If Chatbot Manager shows at least one bot with an Active badge, you are ready. If not, connect a channel first: How to Connect WhatsApp to Scope Wiser: Complete Setup Guide covers the most common route.
Set aside a phone or account you can message from. Testing a bot with the same account that owns it does not work.
Step 1: Open the bot you want to build on
Go to Chatbot Manager in the sidebar.
In the left panel, Bots / Accounts, click the bot. Use "Search by name or number..." or the channel filter chips if you have several.
The bot's name, number or handle, and an Active badge appear in the header alongside Bot Settings and Options. Everything you do from here applies to this bot only — a flow built on a WhatsApp bot does not appear on your Facebook Page.
Step 2: Create a keyword reply
Open the Automation tab, then the Keyword Replies sub-tab.
Click + Create.
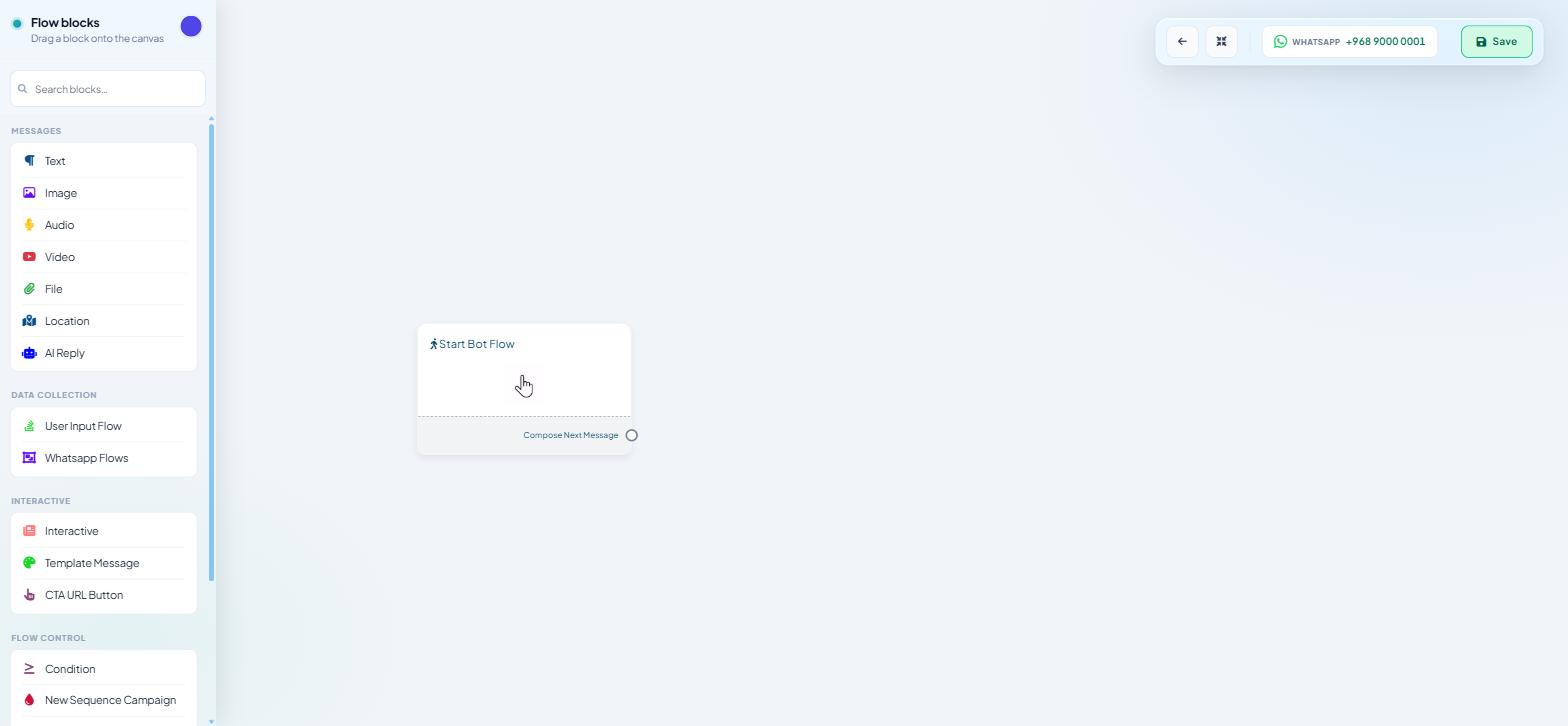
The Flow Builder opens on a canvas containing one node, Start Bot Flow, with a single outlet labelled Compose Next Message. On the left is the palette, headed "Flow blocks — Drag a block onto the canvas".
Step 3: Tell the bot what to listen for
Double-click Start Bot Flow. A panel slides in from the left, headed "Configure Reference".
Fill in the Basic Setup section:
Trigger Keywords — the words that start this flow, separated by commas, for example Hello, Hi, Start. Include the misspellings people actually send.
Keyword matching type — Exact keyword match fires only on the exact word. String match fires when the keyword appears inside a longer message. For a first bot, choose exact matching; string matching catches more messages but can clash with other flows.
Title — required, up to 200 characters. This is the REFERENCE NAME you will see in the list later, so name it for what it does: Opening hours enquiry, not Flow 1.
Two optional sections (Automation Actions, Data & Integrations) appear below — skip them for now.
Click Save Changes. The node now shows your title, the trigger keywords and the matching type.
Step 4: Add the reply
Drag from the Compose Next Message outlet into empty canvas and let go. A picker opens listing the blocks you can add next. Choose Text.
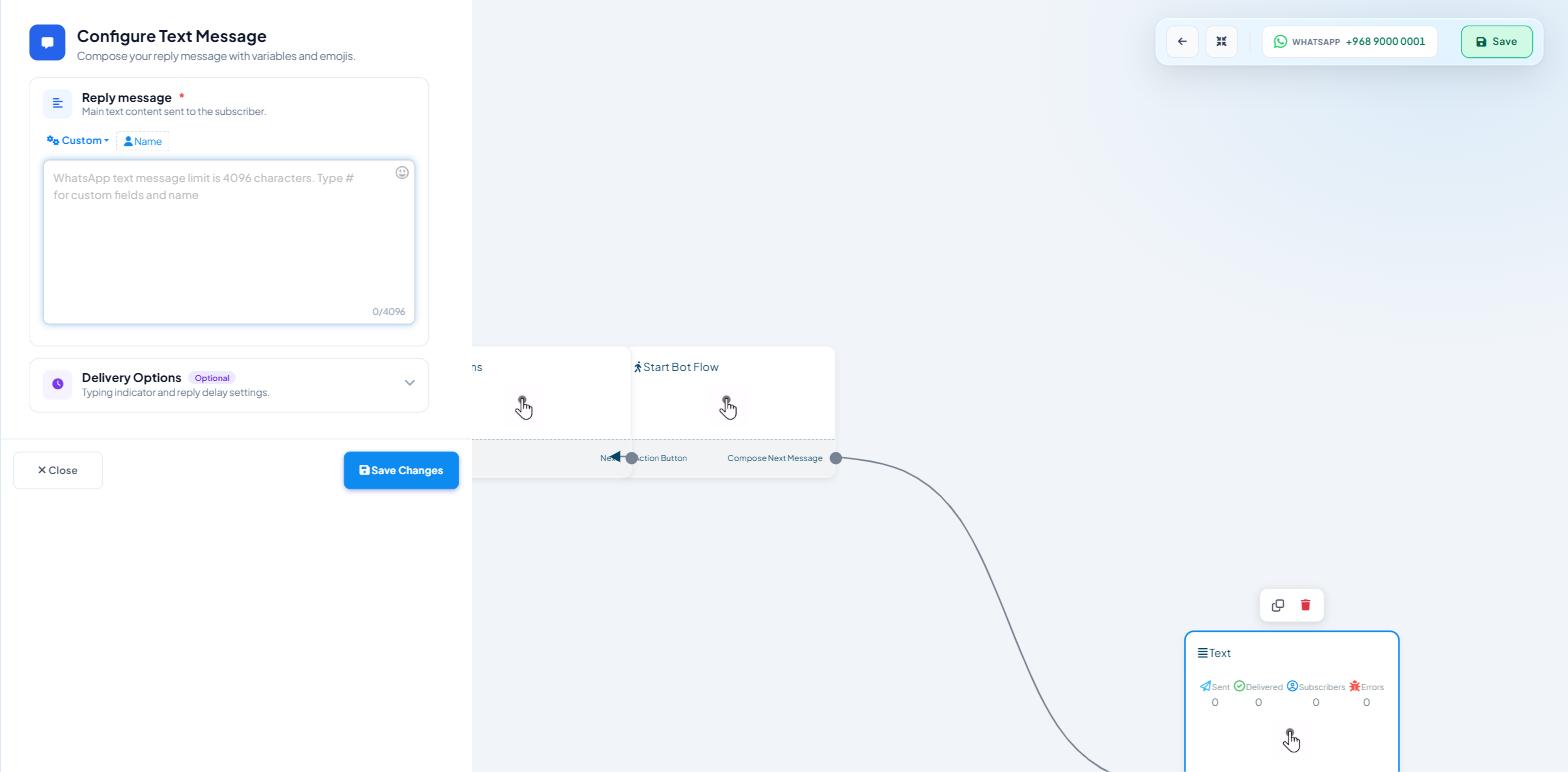
Double-click the new node. The panel reads "Configure Text Message".
Type your reply in Reply message — the only required field, up to 4,096 characters. Write the answer a real customer wants.
Click Name above the text box to insert the customer's first name into the reply.
Optional: under Delivery Options, set Delay in reply and switch on Typing on display. A two-second delay with the typing indicator on reads less robotic; anything longer feels broken.
Click Save Changes.
Step 5: Give people something to press
A single text reply works, but a button turns a dead end into a conversation. The block to use depends on the channel.
On WhatsApp, the INTERACTIVE group in the palette offers three blocks:
Interactive — the block that produces buttons. There is no separate Quick Reply block.
Template Message — sends a pre-approved WhatsApp template, needed only when you are messaging someone outside the 24-hour window.
CTA URL Button — a single button that opens a link.
On Facebook, Instagram and Webchat, use Generic Template or Carousel from the MESSAGES group instead. Those channels do not have Interactive, Template Message or CTA URL Button, and WhatsApp does not have Generic Template or Carousel.
Step 6: Save the flow
Click Save at the top right of the canvas, next to the channel chip showing which bot you are editing. Saving puts the flow live; there is no separate publish step for flows. (Publish Changes belongs to the Bot Settings panel, which is a different screen.)
Step 7: Test it from the outside
Message the bot the way a customer would, from an account that is not yours:
WhatsApp — send the trigger keyword to the connected number.
Facebook / Instagram — message the connected Page or account.
Webchat — open the widget on your site and type the keyword.
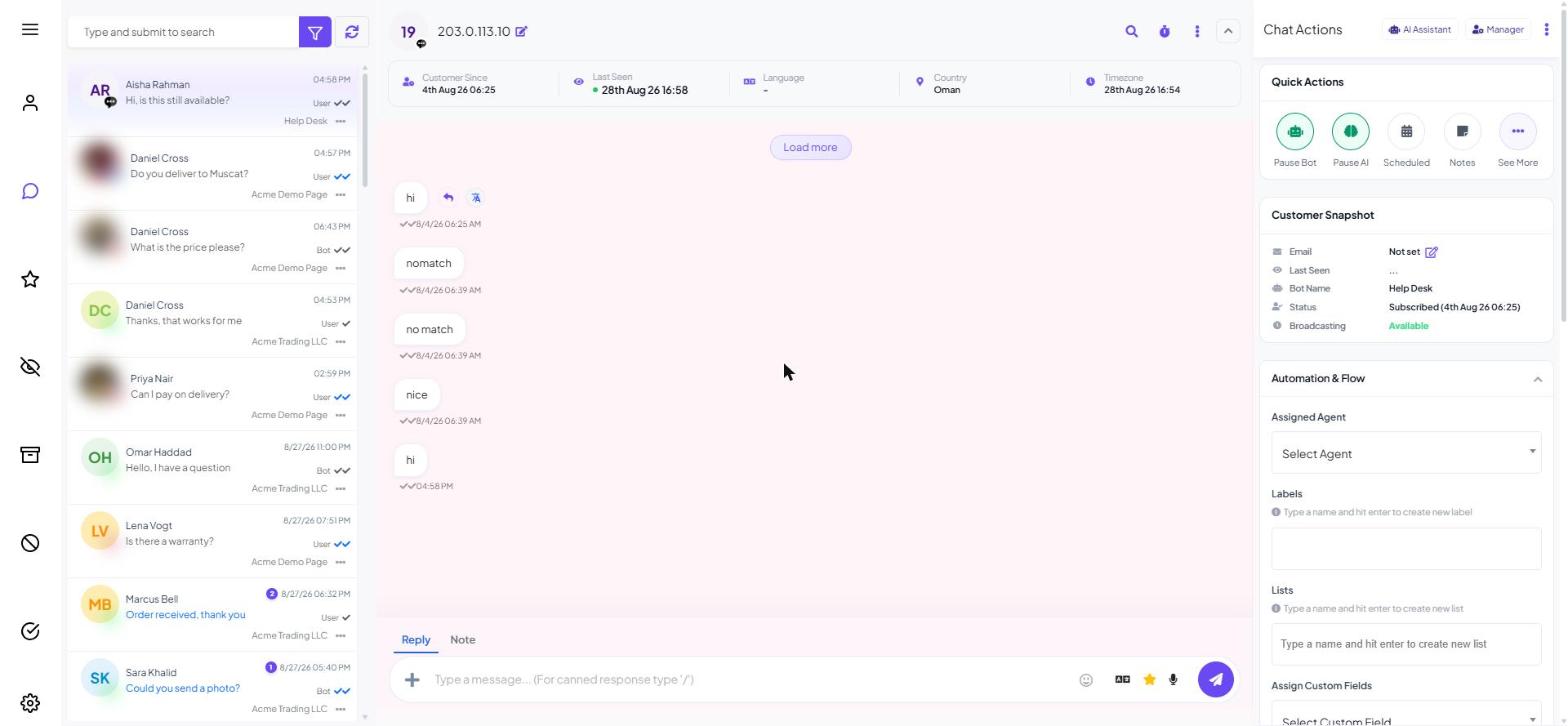
Then open Shared Inbox: the conversation should appear with the reply tagged Bot. Each message block in the Flow Builder also shows Sent / Delivered counts once the flow has run; wait a few minutes before reading them.
If you would rather test against a contact you control, Subscriber Manager › Export/Import › Add a Subscriber creates one manually.
If nothing comes back
Check in this order rather than rebuilding the flow: is the channel still connected, did the flow save, does the keyword match exactly what you sent, and is another flow already using that keyword? Why Your WhatsApp Bot Isn't Responding walks through each check.
What to do next
Read Introduction to Flow Builder: How Scope Wiser Flows Are Built for the rest of the palette — conditions, media, user input flows and API calls. When you want the first reply to do more than answer, Quick Replies, Buttons & CTA URLs covers the button blocks per channel.