
Building Multi-Step Forms
Build a conversational multi-step form in Scope Wiser step by step: create the campaign, add validated questions, branch on answers, close with a confirmation, and make the form reachable.
This guide builds a five-or-six-question form that branches on answers and ends with a confirmation. The blocks are the same on every channel; the few extras that differ are noted below.
Before you open the builder
List each question, its reply type, and what you will do with the answer. Cut any question nothing reads. Aim for five or six questions; people abandon long forms halfway.
Step 1: Create the campaign
Open Chatbot Manager, select the bot, then Data Collection → User Input Flows.
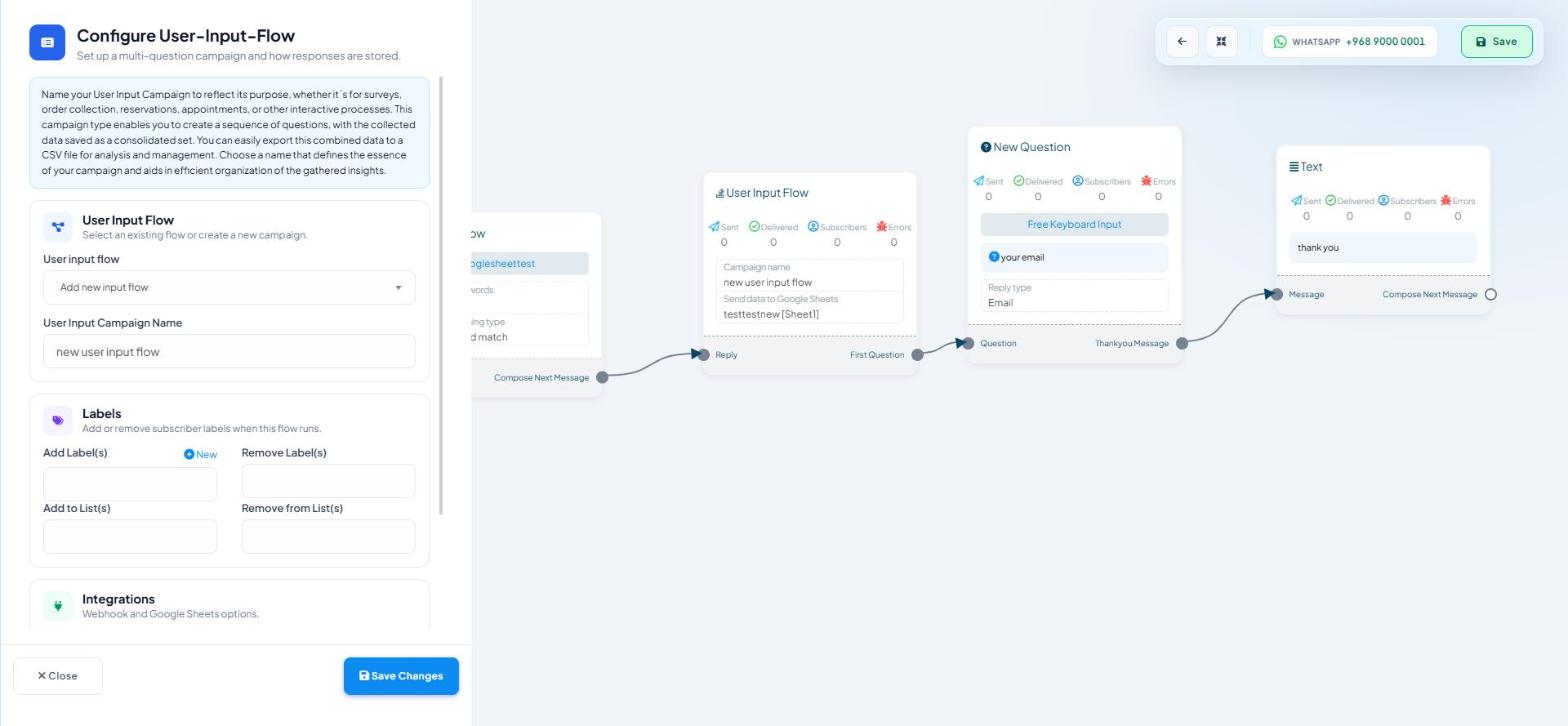
Click + Create. The Configure User-Input-Flow drawer opens on the left; the canvas on the right shows a Start Bot Flow node wired to a User Input Flow node with Reply and First Question ports.
In the User Input Flow card, use Select Flow Campaign to start a new campaign or reuse one. Name it for its purpose; the name appears in the flow list and on every export.
In the Labels card, set Add Label(s), Remove Label(s), Add to List(s) and Remove from List(s). Use ⊕ New to create a label on the spot. A form that tags people as it runs is one whose results you can find again.
In the Integrations card, Forward Data to Webhook sends the answers to another system (for developers); Sync Data to Google Sheets writes them to a connected sheet. Both are per campaign.
For developers
Forward Data to Webhook takes a URL (placeholder https://your-webhook-url.com) and posts each response set to it as it arrives.
Step 2: Build the question sequence
Create the custom fields first under Subscriber Manager → Manage → Custom Fields. Keep the names plain:
full_name,service,preferred_date. You will type them into messages as#full_name#.Back in the builder, add the first question from the User Input Flow node's First Question port.
For each question, enter the text the customer sees, choose the reply type (see Validation Rules for Input Fields), and choose the custom field the answer is stored in.
Connect each question to the next.
Step 3: Branch on what people answer
Use the Condition block from the Flow Builder's Flow Control section. It is available on all four channels.
Skip what you already know. Put a Condition ahead of a question, test whether the field already holds a value, and route past it when it does.
Split the path early. Ask which service the person wants at question one or two, then branch, so nobody answers questions that do not apply to them.
Step 4: Close the loop after the last answer
Connect something to the Reply port of the User Input Flow node:
A Text block confirming what you received, quoting answers back with
#field_name#.A Label Assign block (WhatsApp, Facebook, Instagram) to mark them as complete. Webchat's Flow Control section holds only Condition, so on Webchat use the campaign's Add Label(s) field instead.
A New Sequence Campaign block (WhatsApp, Facebook, Instagram) to enrol them in follow-up.
An HTTP API block (for developers) to push the answers into your own system.
Never end a form with silence. The customer answered six questions and needs to know it worked.
Step 5: On WhatsApp, hand off to a WhatsApp Flow where it fits
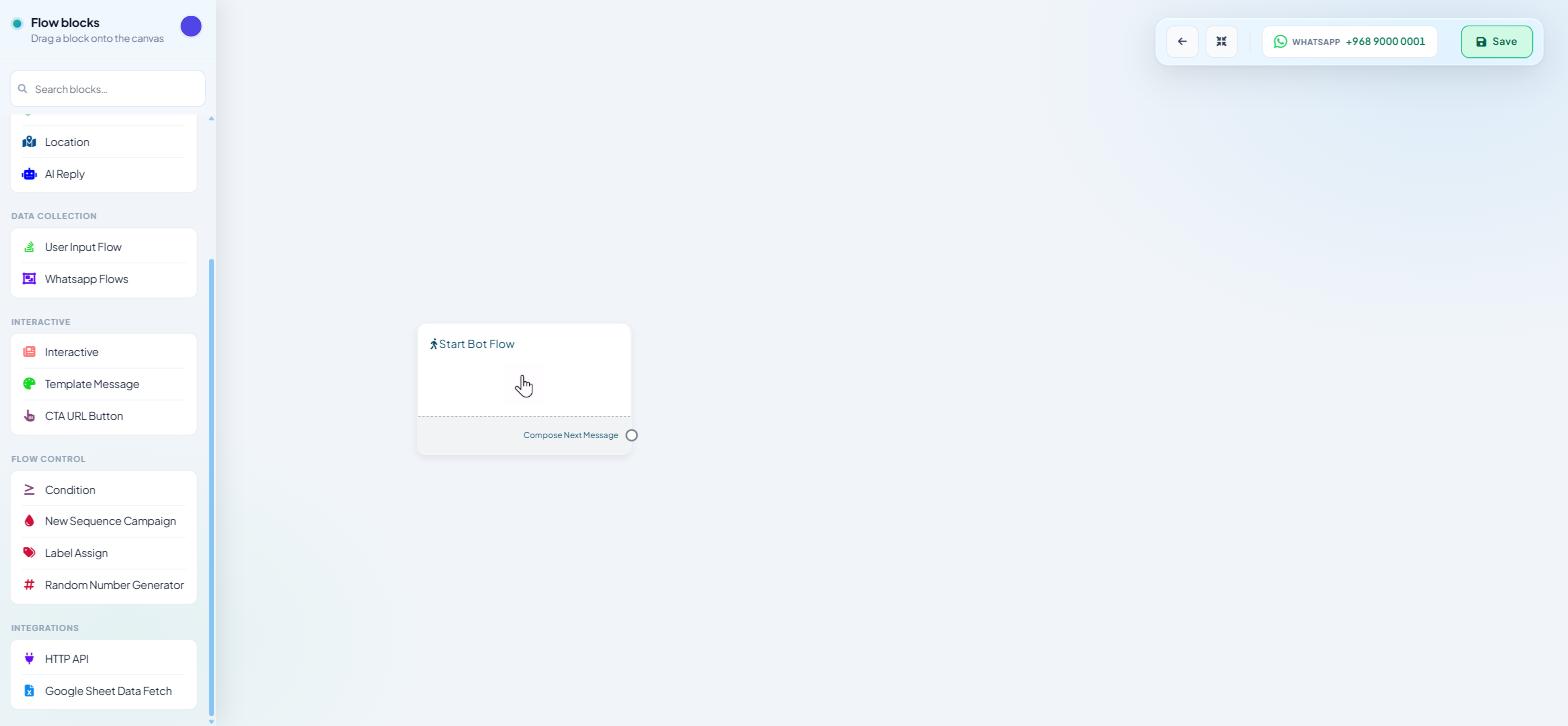
WhatsApp's palette has a Whatsapp Flows block under Data Collection next to User Input Flow. It sends a Meta form screen instead of another chat question. Use two or three chat questions to qualify, then a WhatsApp Flow for the long structured part, then a closing message.
Build the form first under Data Collection → WhatsApp Flows: + Create opens the Whatsapp Flows Form builder (Header, Text Field, Text Area, Checkbox Group, Radio Group, Select, Date Field, Submit Button); Flows Studio (Beta) builds multi-screen forms. The form must be published with Meta before a flow can send it — check the STATUS column, and check the Preview Url before publishing.
Step 6: Make the form reachable
Keyword Replies (Automation tab) — a word or phrase that starts the flow. Every channel.
Quick Actions (Automation tab) — buttons that launch it from elsewhere in your automation.
Persistent Menu (Engagement tab) — a permanent menu entry on Facebook, Instagram and Webchat.
Get Started Settings (Engagement tab) — make the form the first thing a new contact meets.
Step 7: Test as a customer, then read the results
Save from the top right and run the whole flow on the real channel. Answer badly on purpose: give an invalid email, abandon halfway, come back later.
Open the contact in Subscriber Manager and check the Input Flows and Custom Fields tabs. Check the run you completed. If the answers are there but the fields are empty, a mapping is wrong.
What to do next
Using Collected Data in Follow-Up Messages — putting these answers back into your messaging. Conditions, Triggers & Branching Logic — nested conditions and several paths.