
Subscriber Manager: A Complete Overview
Scope Wiser's Subscriber Manager holds every contact from every channel on one page. Learn the filters, the bulk actions, the eight-tab detail panel and what each control is for.
Subscriber Manager is the page that holds every person who has messaged one of your bots. This article shows you what is on the page, what each control does and how to act on many contacts at once.
Open it from the sidebar: Subscriber Manager. WhatsApp, Facebook, Instagram and Webchat contacts all appear here on one screen; a channel filter separates them.
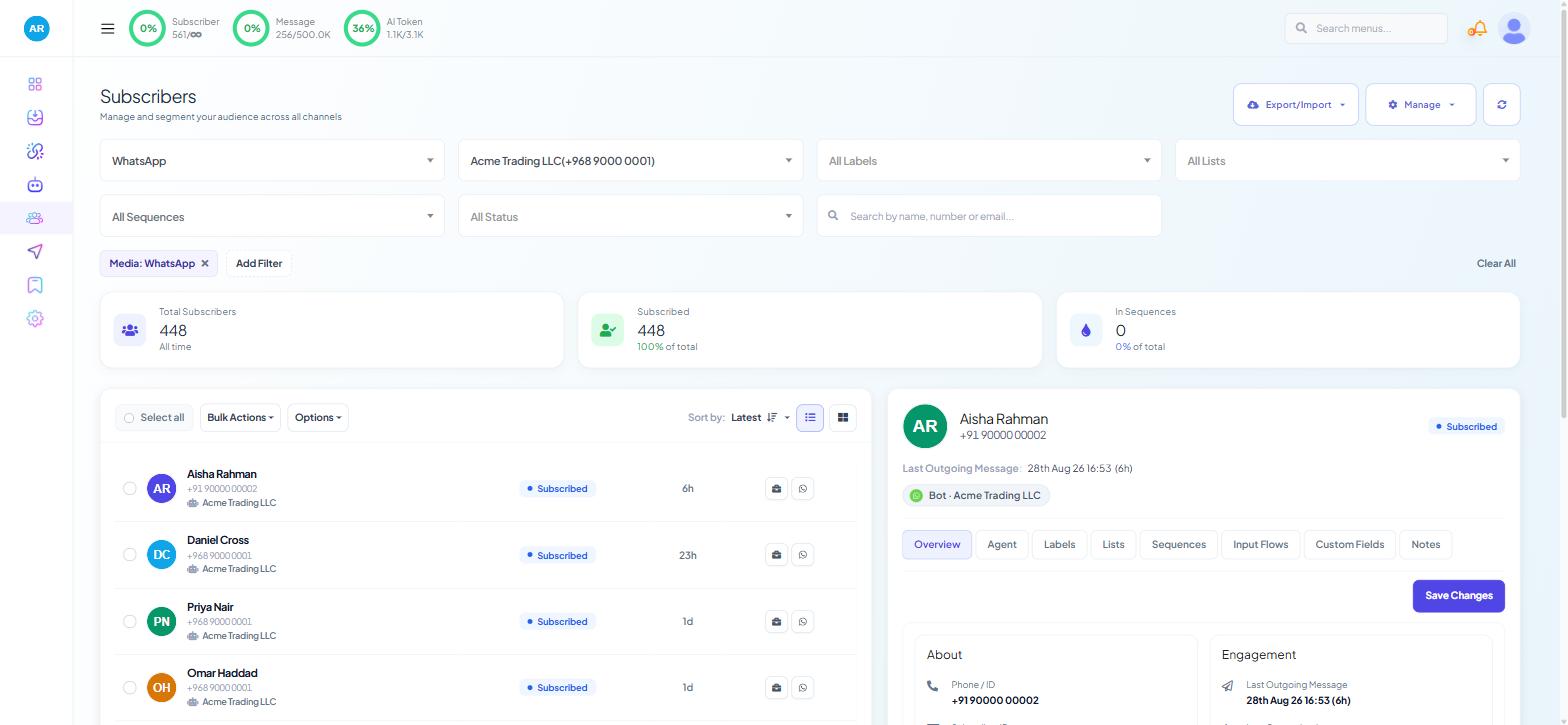
The three stat cards
Three cards sit above the list:
Total Subscribers — the all-time count, within the current filter.
Subscribed — active contacts, shown as a percentage of the total.
In Sequences — how many are currently enrolled in a follow-up sequence, also as a percentage.
If Subscribed % keeps falling, more people are opting out than joining. If In Sequences is near 0 but you use sequences, check the sequence trigger (see Sequence Triggers: Labels, Time and Events).
The filter row
Directly under the heading:
Control | What it does |
|---|---|
Channel | Switches between WhatsApp, Facebook, Instagram and Webchat |
Bot / account | Narrows to one connected bot within that channel |
All Labels | Filters by the labels you have applied |
All Lists | Filters by list membership |
All Sequences | Filters by the sequence a contact is enrolled in |
All Status | All Status, Subscribed or Unsubscribed |
Search | "Search by name, number or email..." |
Each filter shows as a chip; press Clear All before trusting a count. See Viewing & Filtering Subscribers.
Labels and Lists are two different systems. See Labels, Lists & Segments: How Scope Wiser Groups Subscribers.
The two menus at the top right
Export/Import holds three items:
Export all as CSV — everything in the current filter, not just the rows on screen.
Import from CSV — add contacts from a spreadsheet. See Importing Contacts from a CSV or Google Sheet.
Add a Subscriber — type in one contact by hand.
Manage holds the three things a subscriber can be tagged with:
Labels
Lists
Custom Fields
Create your labels, lists and fields here before you start segmenting.
Acting on many contacts at once
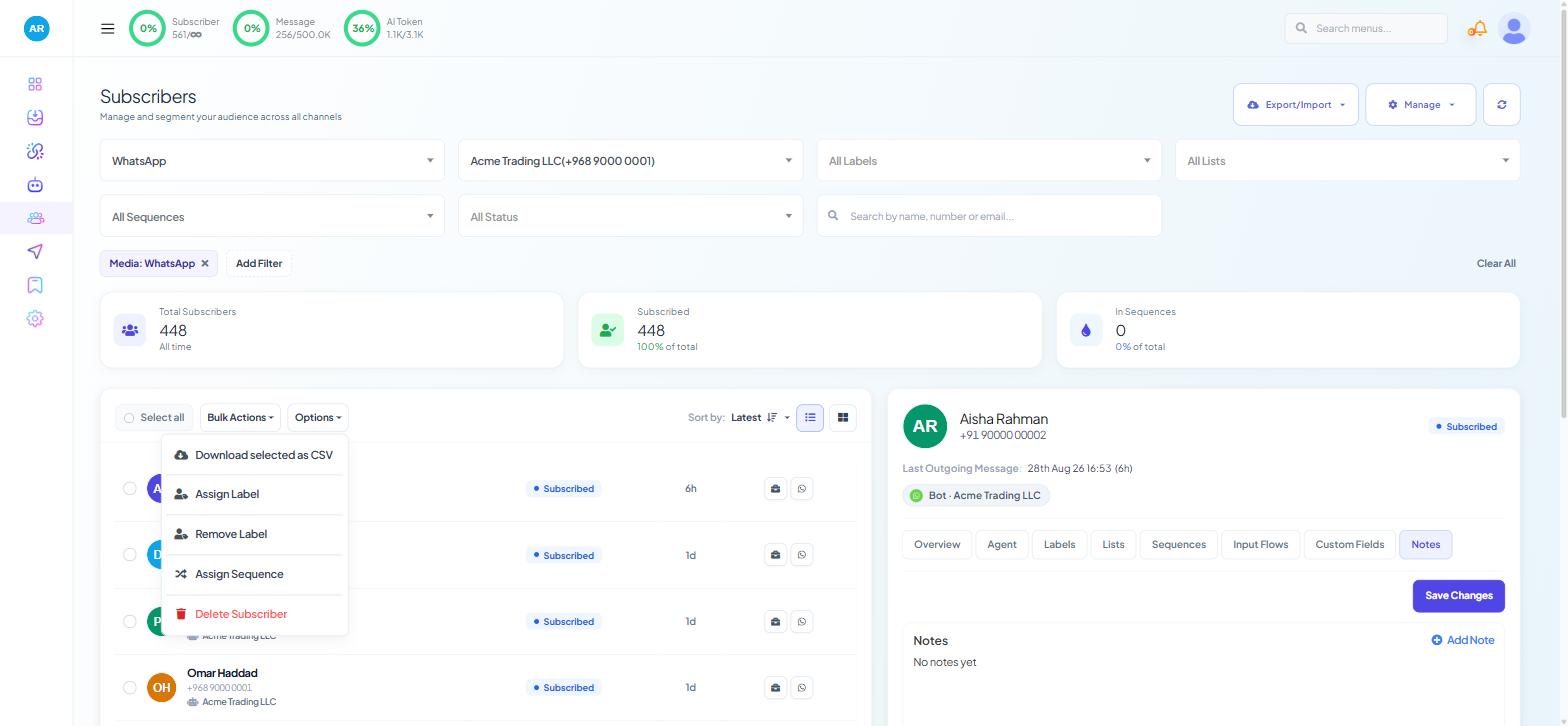
Above the list sit Select all, Bulk Actions, Options, a Sort by control (Latest or Oldest) and a list/grid toggle.
Bulk Actions offers:
Assign Label
Add to List
Remove from List
Assign Sequence
Options offers:
Download selected as CSV
Assign Label
Remove Label
Assign Sequence
Delete Subscriber
Use Options to remove a label, delete a contact (needs the DELETE permission on Subscribers) or download the ticked rows as CSV. Use Bulk Actions to add to or remove from a list.
To act on a group:
Set your filters.
Set the page size (10, 25, 50, 100, 500 or 1,000 rows). Select all only ticks the rows on the current page, so raise it first.
Tick Select all, or tick individual rows.
Open Bulk Actions or Options and choose the action.
Deleting a subscriber is permanent. It removes the record and its field values, and re-importing the contact does not restore their conversation history.
The subscriber detail panel
Click a contact to open a panel with eight tabs and a Save Changes button:
Overview — the About block (Phone / ID, Subscriber ID, Profile Name) and the Engagement block (Last Outgoing Message, Last Commnication (spelled this way on screen), Subscribed at). Check this before you spend a template message on someone who has gone quiet.
Agent — the team member this conversation belongs to.
Labels and Lists — the two grouping systems, editable per contact.
Sequences — which follow-up sequences they are enrolled in.
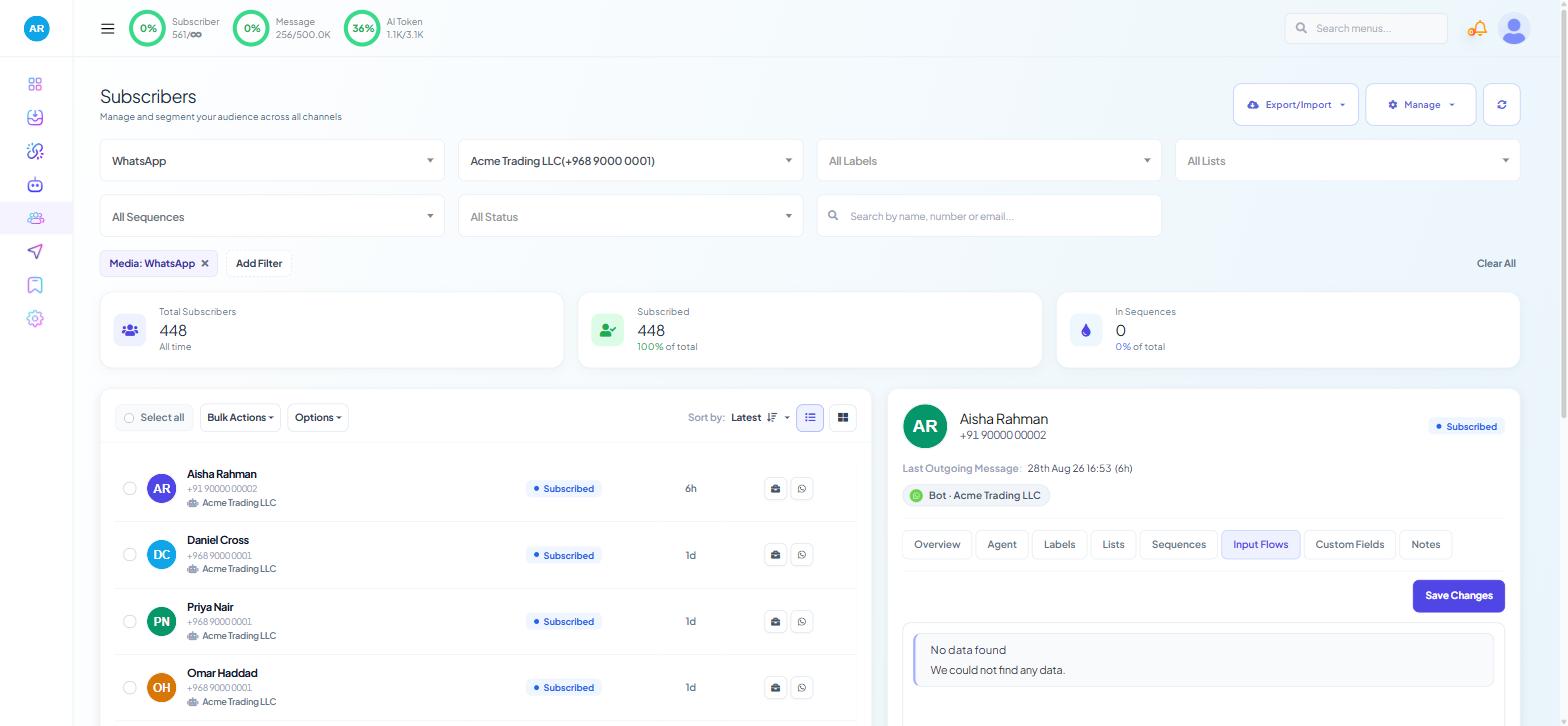
Input Flows — the answers this person gave to your questions: the email they typed, the service they picked.
Custom Fields — saved details such as email or city that the bot can insert into messages.
Notes — internal notes for your team. The customer never sees these.
Nothing in this panel is saved until you press Save Changes.
To pause the bot for one conversation, use Shared Inbox instead: the Chat Actions rail has Pause Bot and Pause AI, alongside Customer Snapshot, Labels, Lists and Message Sequence. Both screens show the same record, so a change in one appears in the other.
Common jobs
Send a reminder to people who dropped off. Filter by the label your flow applies at drop-off, then Bulk Actions → Assign Sequence.
Qualify a lead. Open the Input Flows tab to read what they told the bot, then assign a team member on the Agent tab.
Clean the list. Filter All Status → Unsubscribed, review, then export or delete. Unsubscribed contacts still count towards your subscriber limit.
Add offline leads. Export/Import → Add a Subscriber for one contact, or Import from CSV for a list.
Send data to another system. Export/Import → Export all as CSV for the full set, or Options → Download selected as CSV for the ticked rows.
Set the filter, check the count on the stat cards, then act — a wrong bulk sequence assignment cannot be undone in one click.
What to do next
Read Viewing & Filtering Subscribers for the filter combinations, then Labels, Lists & Segments: How Scope Wiser Groups Subscribers to agree label names before the list grows.