
Building an AI Sales Agent for eCommerce on WhatsApp
Build a Scope Wiser AI agent that helps people buy on WhatsApp: the knowledge to attach, a short sales prompt, the Shopify and WooCommerce actions, routing to a support agent, and where a person takes over.
A sales agent is an ordinary Scope Wiser AI agent with a sales prompt, product knowledge attached, and a clear rule about where it must stop. This guide builds one on WhatsApp, the only channel with a Commerce tab.
Before you start
A connected WhatsApp Business Account. See How to Connect WhatsApp to Scope Wiser.
A product catalogue, if you want to show products in chat. Chatbot Manager → Commerce has Store Automation and Product Catalog on WhatsApp bots only.
Product information the AI can read. A catalogue in Meta is what gets displayed; knowledge in the agent's knowledge set is what lets it answer "is this suitable for a small office".
Step 1: decide what the agent is for
Give the sales agent one job: help buyers choose and order. Put problems and returns in a separate support agent. Agent Routing (step 5) lets you run both.
Step 2: assemble the knowledge
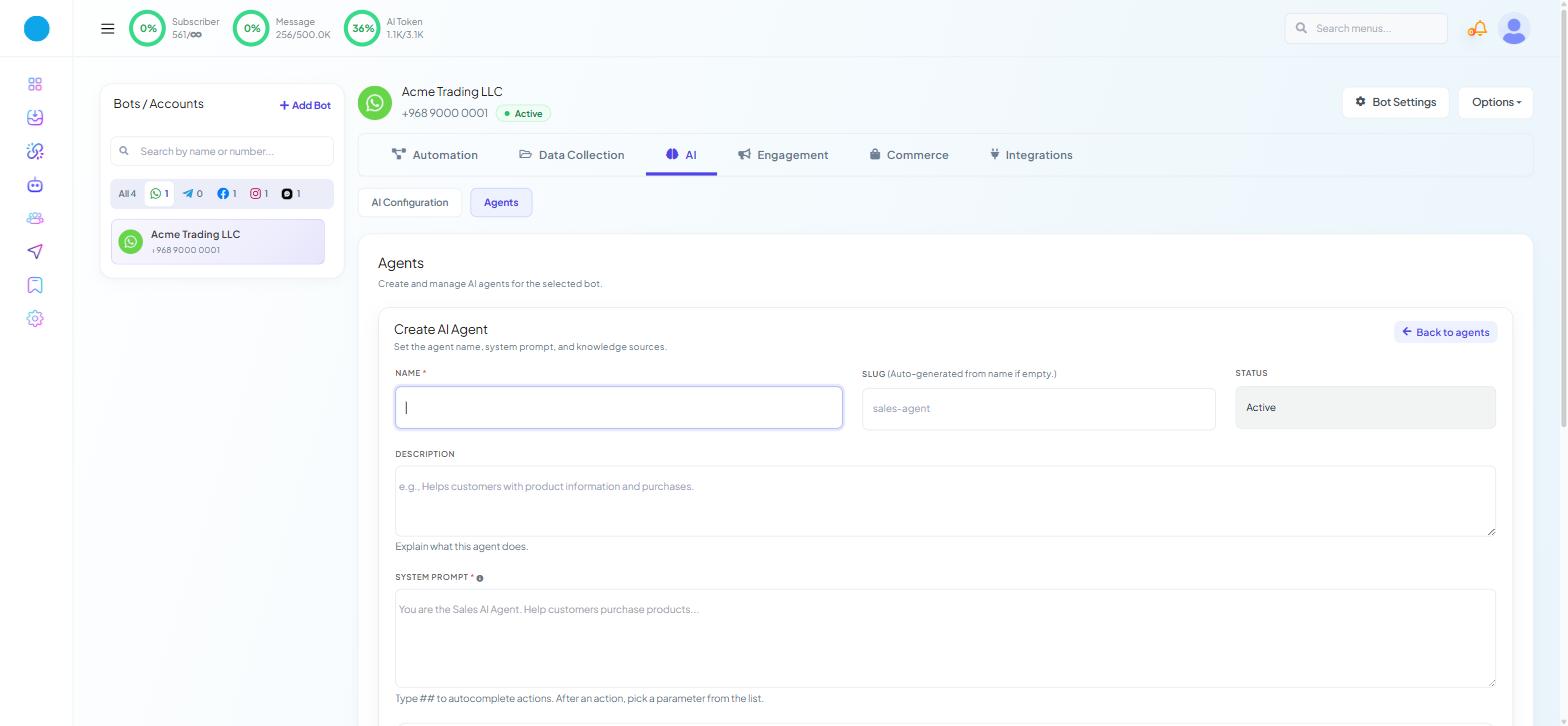
Open Chatbot Manager, select the WhatsApp bot, then AI → Agents → + Create Agent.
Fill in NAME, DESCRIPTION and STATUS.
Under Knowledge Sources, open Knowledge Set, choose Create New and name it (for example Products).
Attach Q&A pairs (Content), spec sheets (File), your pricing page (URL), product photos (Media), stock sheet (Google Sheet).
Each source type is explained in Training Your AI: Knowledge Sets, URLs, Files and Live Data.
Step 3: write the system prompt
In SYSTEM PROMPT, cover five things: a role, a scope, a length limit, what to do when unsure, and when to hand over. Example for a fictional business:
You are the sales assistant for Acme Trading, which sells commercial coffee equipment.
Help customers choose the right machine and place an order. Answer questions about products, pricing, delivery and returns using only the information you have been given.
Ask at most one clarifying question before giving a useful answer. Keep replies to two or three short sentences unless the customer asks for detail.
If you do not know something — stock levels, a discount, a delivery date for a specific address — say so plainly and offer to have a colleague confirm. Never estimate a price or a date.
Hand the conversation to a person if the customer is unhappy, is asking about an existing order that has gone wrong, or asks to speak to someone.
The "when unsure" line prevents most of the damage. Keep the prompt short — it is sent with every reply — and do not tell the agent to push upgrades.
Step 4: connect the prompt to your store
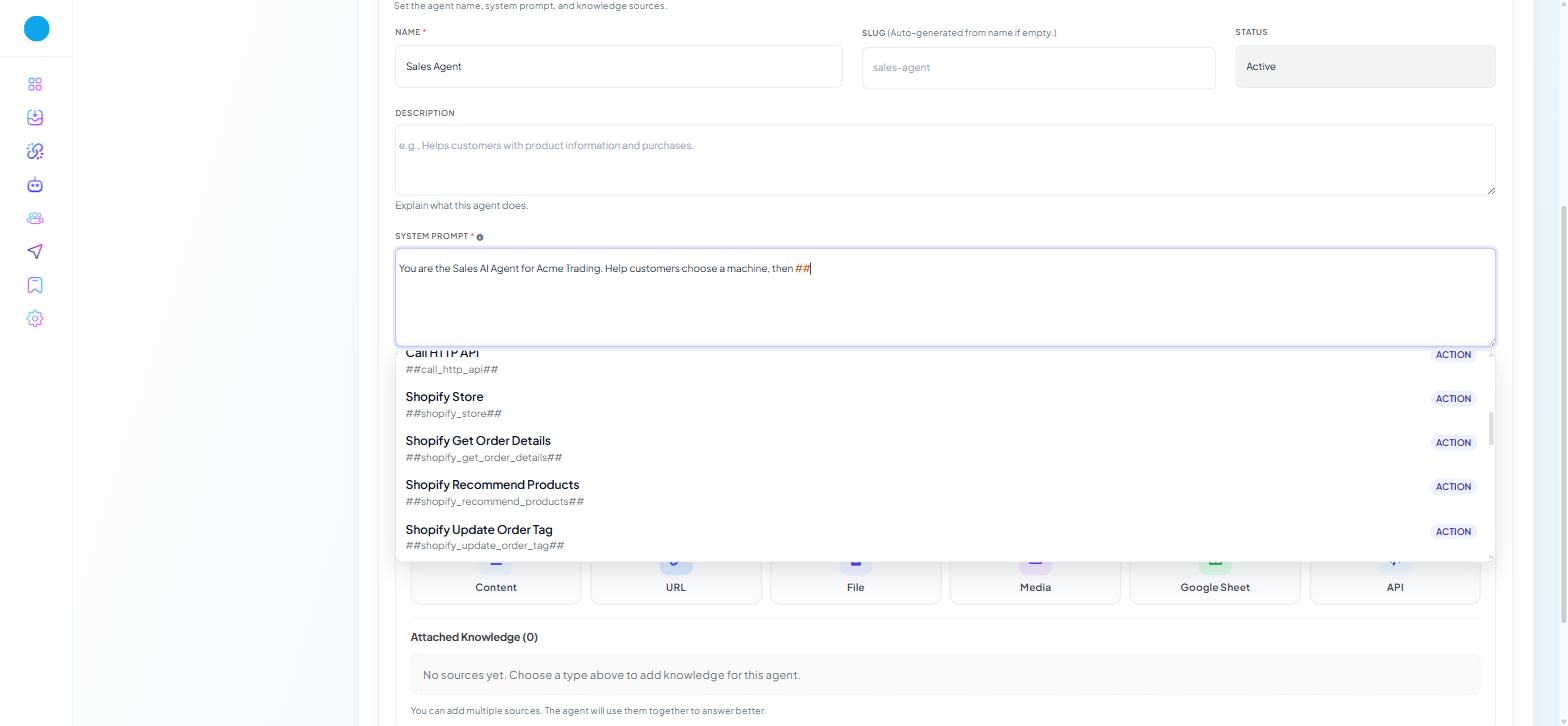
In SYSTEM PROMPT, type
##. A list of actions appears.Pick the Shopify or WooCommerce actions from the
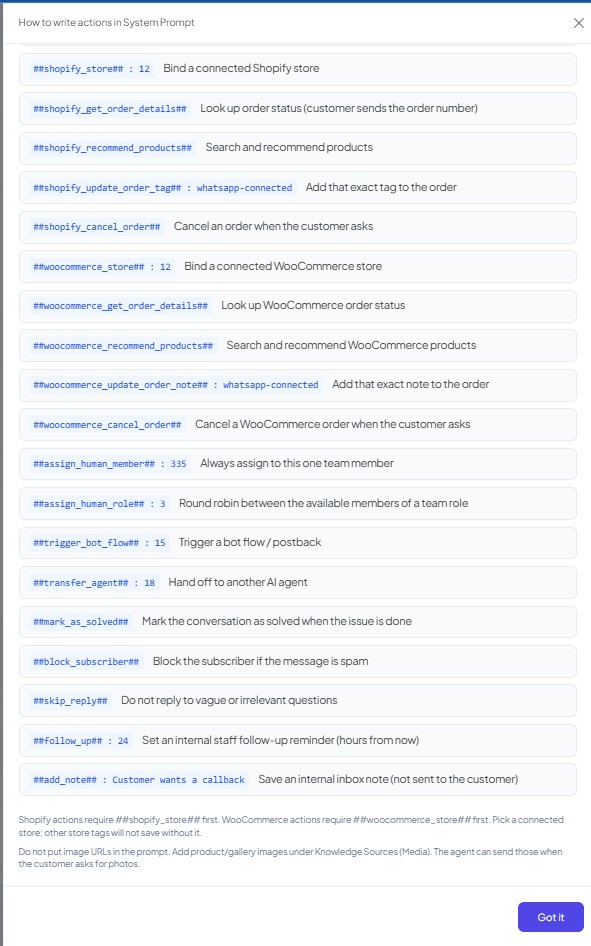
##list — full list in AI Intent Detection and Agent Routing. Put##shopify_store##before any Shopify action, or##woocommerce_store##before any WooCommerce action.Write each action as a condition: "When the customer gives an order number and asks where it is, look it up with
##shopify_get_order_details##and tell them the status plainly."Click Save Agent.
Two more actions earn a place: ##save_custom_field## stores what the customer told you (size, model, delivery address) on their record; ##assign_sequence## puts someone who did not buy today into a follow-up sequence.
Two cautions:
Cancelling is real.
##shopify_cancel_order##and##woocommerce_cancel_order##cancel an actual order with no confirmation step. Leave them out and route cancellations to a person.Recommendations still need knowledge. The recommend-products actions read your store; they do not know which model suits a small office. That comes from the knowledge set in step 2.
Step 5: add the second agent and route between them
Create a support agent the same way, with its own prompt and knowledge (order problems, faults, returns).
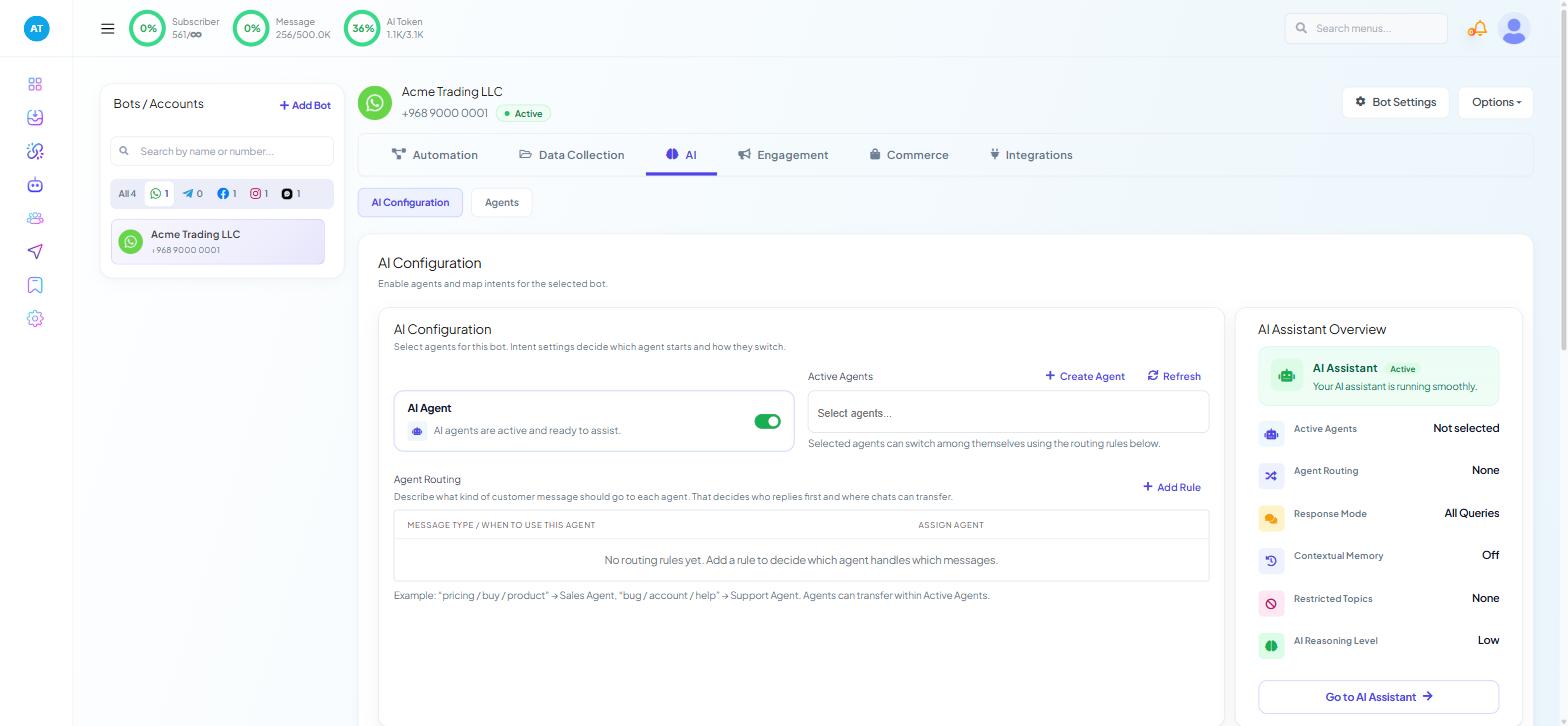
Then go to AI → AI Configuration, switch the AI Agent toggle on, and add both agents to Active Agents. Add one routing rule each under Agent Routing (product/pricing → Sales, order problem → Support). Agents in Active Agents can also pass a conversation to each other with ##transfer_agent## in the prompt.
Step 6: configure the behaviour
On the same page, set:
Enable Contextual Memory on, Memory Window
2AI Response Mode: AI as a Fallback Only
Delay for AI Reply (Seconds):
3AI Reasoning Level for Responses:
MediumResponse for Restricted Keywords: replace the default with a line that says what happens next
Click Save Settings. Each setting is explained in AI Intent Detection and Agent Routing.
Step 7: know where the agent stops
Write into the prompt: no payments, no promised dates, no discounts, no complaint handling — hand these to a person.
Make the handover real: Assign to Team or Department under Assignment on the same page, and Pause AI in the Shared Inbox for a single conversation. Somebody has to be watching the inbox.
Step 8: test as a customer
Message the WhatsApp number from a phone that is not connected to the account:
Ask a product question. Check the answer is right.
Ask something the knowledge does not cover. Check it says so.
Report a problem with an order. Check it reaches the support agent.
Ask for a person. Check a person can see it.
Then watch the AI Token meter over the first week, especially with contextual memory on.
What to do next
AI Intent Detection and Agent Routing for routing with more than two agents. AI Tokens: How Usage and Cost Actually Work if conversations cost more than expected.