
Order Notifications: WooCommerce & Shopify
Send WhatsApp order confirmations from a WooCommerce or Shopify store: the quick Store Automation route, the Webhook Workflow route built from a pasted sample payload, and status-change notifications.
There are two ways to build this in Scope Wiser and they suit different situations. Start with the first. Move to the second only when you hit something it cannot do.
Store Automation | Webhook Workflow | |
|---|---|---|
Setup | One form | Callback URL, store-side webhook, field mapping |
Where | Chatbot Manager → Commerce → Store Automation | Chatbot Manager → Automation → Webhook Workflows |
Conditions | No | Yes |
Custom data mapping | No | Yes |
Good for | The standard confirmation | Anything conditional or unusual |
Both need an approved WhatsApp template and a connected store. If you have neither, read Connecting WooCommerce or Connecting Shopify first.
Step 1: get a template approved
Order confirmations go out to people who have not messaged you, so they must be WhatsApp template messages.
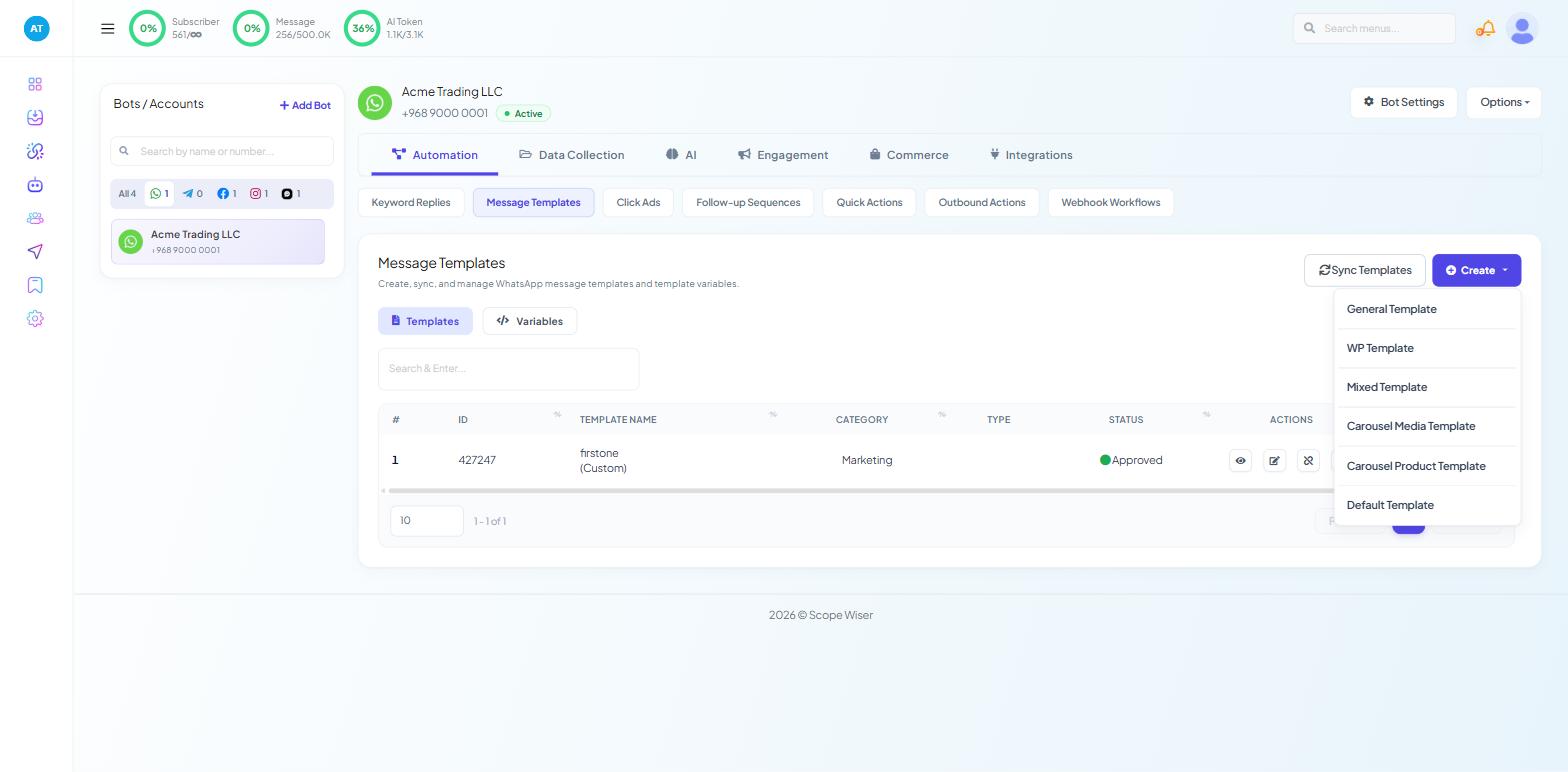
On the WhatsApp bot, go to Chatbot Manager → Automation → Message Templates. The screen has two inner tabs, Templates and Variables, a Sync Templates button, and a Create dropdown offering General Template, WP Template, Mixed Template, Carousel Media Template, Carousel Product Template and Default Template.
Default Template is the shortcut. It creates the system templates that store automation expects, including the order-notification one, already worded for the job. Create them, then Sync Templates to pull their approval status back from Meta. A template with an approved status is usable; a pending one is not, and store automation will simply not send.
If you write your own instead, create the variables first — on the Variables tab — and use them in the body for the parts that change: the product list, the total, and an estimated delivery date. Creating & Getting WhatsApp Templates Approved covers what gets a template rejected.
Recipe A: WooCommerce, the quick route
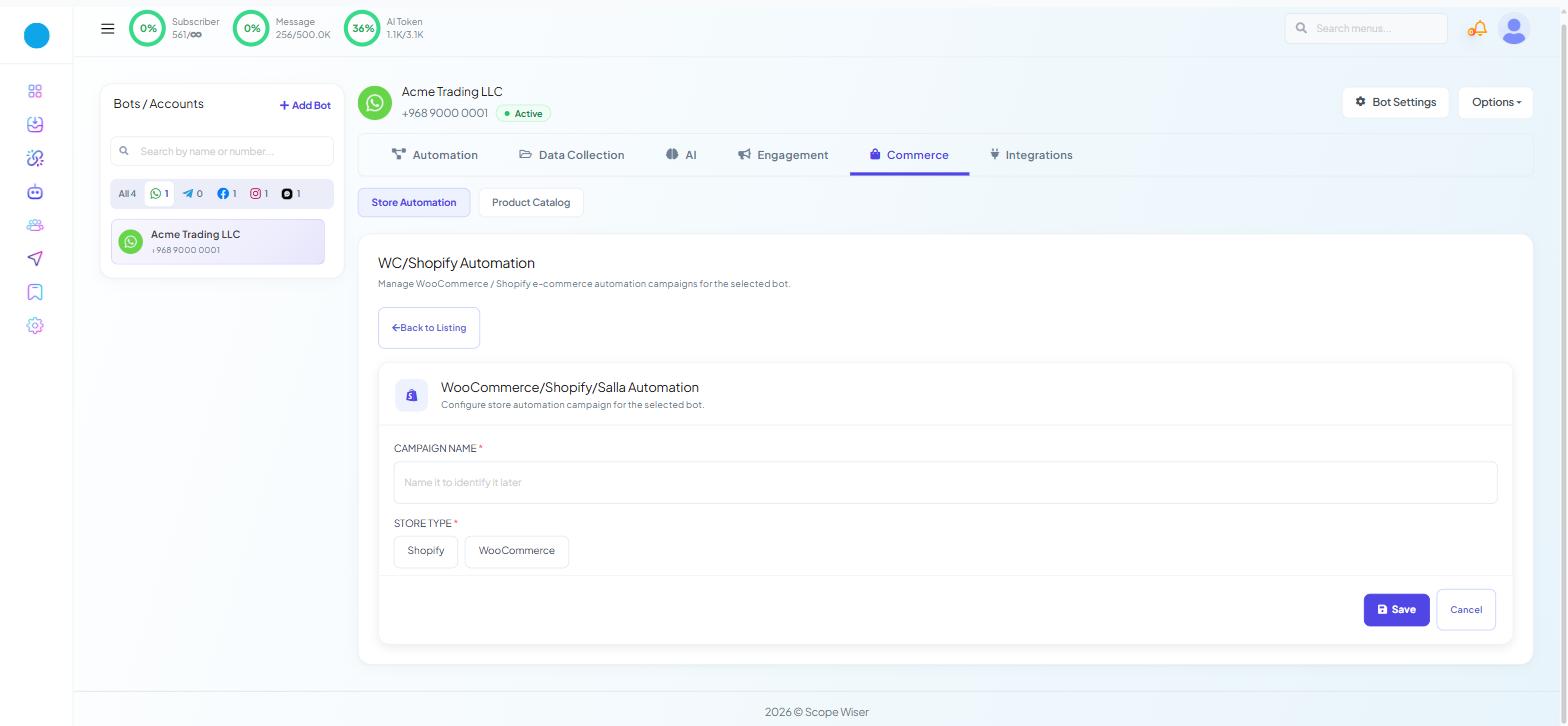
Go to Chatbot Manager → Commerce → Store Automation. The page is headed WC/Shopify Automation — "Manage WooCommerce / Shopify e-commerce automation campaigns for the selected bot." — and lists campaigns by CAMPAIGN NAME, STORE TYPE, STATUS and ACTIONS.
Remember that Commerce exists on WhatsApp bots only. If there is no Commerce tab, the usual cause is that a Facebook, Instagram or Webchat bot is selected — but on a team account it can also be your role: WHATSAPP - CATALOG and WHATSAPP - WORDPRESS/SHOPIFY INTEGRATION are separate toggles under Control Panel → User Permission, and a capability switched off for a role is invisible to everyone holding it, with no error shown.
Click Create. The campaign form opens with two fields:
CAMPAIGN NAME * — placeholder "Name it to identify it later".
STORE TYPE * — two buttons, Shopify and WooCommerce.
Choose WooCommerce and the rest of the form appears:
SELECT STORE API * — the stored store API profile, with an ADD NEW API link beside it; if the store you connected is not listed, create a profile under Control Panel → Settings & Integration → API Integration → E-commerce API.
ACTION * — for WooCommerce, three options: Order Notification, COD Verification and Order Update Notification. Choose Order Notification.
MESSAGE DELAY (MINUTES) * — defaults to
0. Leave it at0for a confirmation; the message should arrive while the customer is still on the thank-you page.MESSAGE TEMPLATE * — your approved template, with a refresh icon and a Create button beside it.
COUNTRY CODE (optional, set if phone number does not have any country code) — set this if your checkout stores local-format numbers. Leaving it blank when your store needs it is the most common reason a campaign runs and nothing is delivered.
ASSIGN LABEL and ASSIGN SEQUENCE — optional. A label on everyone who has ordered is worth having whether or not you use it today.
Click Save, then place a test order and watch for the message.
Recipe B: Shopify, the quick route
Identical form, one difference in the middle of it. Set STORE TYPE to Shopify and the ACTION dropdown gains a fourth option, Abandoned Cart Recovery, which becomes the default. Change it to Order Notification.
Selecting Shopify also changes the default MESSAGE DELAY (MINUTES) to 30, because the default action is cart recovery. For an order confirmation, set it back to 0.
Everything else — store API, template, country code, label, sequence — behaves the same. Save, place a test order, check WhatsApp.
Recipe C: the Webhook Workflow route
Take this route when the quick one cannot express what you need: a confirmation only for orders over a value, different wording for different regions, extra data pulled out of the order, or an event the stock actions do not cover.
Read Webhook Workflow: Complete Beginner's Guide first — this is the short version. The one thing to carry over from it is that you do not have to start at the store. Paste a sample order payload into the workflow, press Run Test, and you can build and check the whole thing before you touch WooCommerce or Shopify at all.
1. Create the workflow. Chatbot Manager → Automation → Webhook Workflows → Create. The form opens with Workflow Details and nothing else: set WORKFLOW NAME *, choose your MESSAGE TEMPLATE *, check the TEMPLATE INFO preview shows the variables you expect, and press Create Workflow. The rest of the form — callback URL, mapping, conditions, delay — only appears after that button.
2. Load a payload. In Configure Webhook Data, open the Custom JSON Body tab, paste a sample order payload into the text box and press Run Test — "Click Run Test to load mapping fields without an external trigger." The mapping fields fill from it immediately. If you would rather use live data, paste the Webhook Callback URL into your store first (step 4), fire one real order, then use the Real-time Response tab's Capture Webhook Response button instead. A test counts as 1 in the TARGETED column.
3. Map the fields. Map PHONE NUMBER and each variable. Attach the Trim Left (+) formatter to the phone row and Concat List Items to the product list — how to build them is in Webhook Workflow: Complete Beginner's Guide → Data Formatters. Format Number on the order total is worth adding while you are there, so the message says a price rather than a long decimal.
4. Add the webhook in your store. Copy the Webhook Callback URL from Configure Webhook Data — or use Copy Webhook URL from the three-dot (⋮) menu at the end of the row on the listing.
WooCommerce: in WordPress, WooCommerce → Settings → Advanced → Webhooks → Add webhook. Give it a name, set the status to active, set the topic to Order created, and paste the callback URL as the delivery URL. Save.
Shopify: in the Shopify admin, Settings → Notifications → Webhooks → Create webhook. Set the event to Order creation, the format to JSON, and paste the callback URL.
5. Add a rule if you need one. Under Send message based on conditions, + Add Rule gives you Select Data Field · Select Operator · Put Value, and two toggles decide whether any rule or all rules must satisfy.
6. Set a delay if you want one. Send message with a delay is a single row — Wait 0 minutes after a webhook triggers. Leave it at zero for a confirmation.
7. Decide what happens afterwards. Actions following successful webhook call can assign the conversation to a team role or team member, add or remove a label, add or remove a sequence, and set the SUBSCRIBER NAME from a field in the payload. A label on everyone who has ordered costs nothing and gives you a segment; setting the subscriber name is what makes the inbox readable.
8. Save Workflow, then place a real test order and check the workflow's report before checking WhatsApp.
Status-change notifications
A confirmation covers the moment of ordering. What customers actually chase is what happened afterwards: has it shipped, has it been dispatched, is it done.
On WooCommerce there is a stock action for this. In a store automation campaign, set ACTION to Order Update Notification instead of Order Notification. Same form, same fields.
For control over which transitions send, use a Webhook Workflow. The setup is Recipe C with two changes:
In WordPress, set the WooCommerce webhook topic to Order updated rather than Order created.
Add a variable for the new status to your template, map it from the status field in the payload, then add the rule that limits which transitions send. Under Send message based on conditions, click + Add Rule:
Select Data Field=status,Select Operator= Equal (=),Put Value=completed. Add one rule per transition you want and choose Send message only if any of the following rules satisfies.
Without a rule, every save on the order triggers a message. An order that goes pending → processing → completed, with an address correction along the way, produces four messages about one parcel. Pick the two transitions customers care about, usually dispatched and delivered, and rule out the rest.
What to check when nothing arrives
Work down the chain in order. Guessing wastes more time than checking does.
Did the store call? WooCommerce and Shopify both log webhook deliveries. A failure there — timeout, 404, disabled webhook — ends the investigation. On the Scope Wiser side, LAST CALLED AT on the Workflow Report tells you when the workflow was last touched.
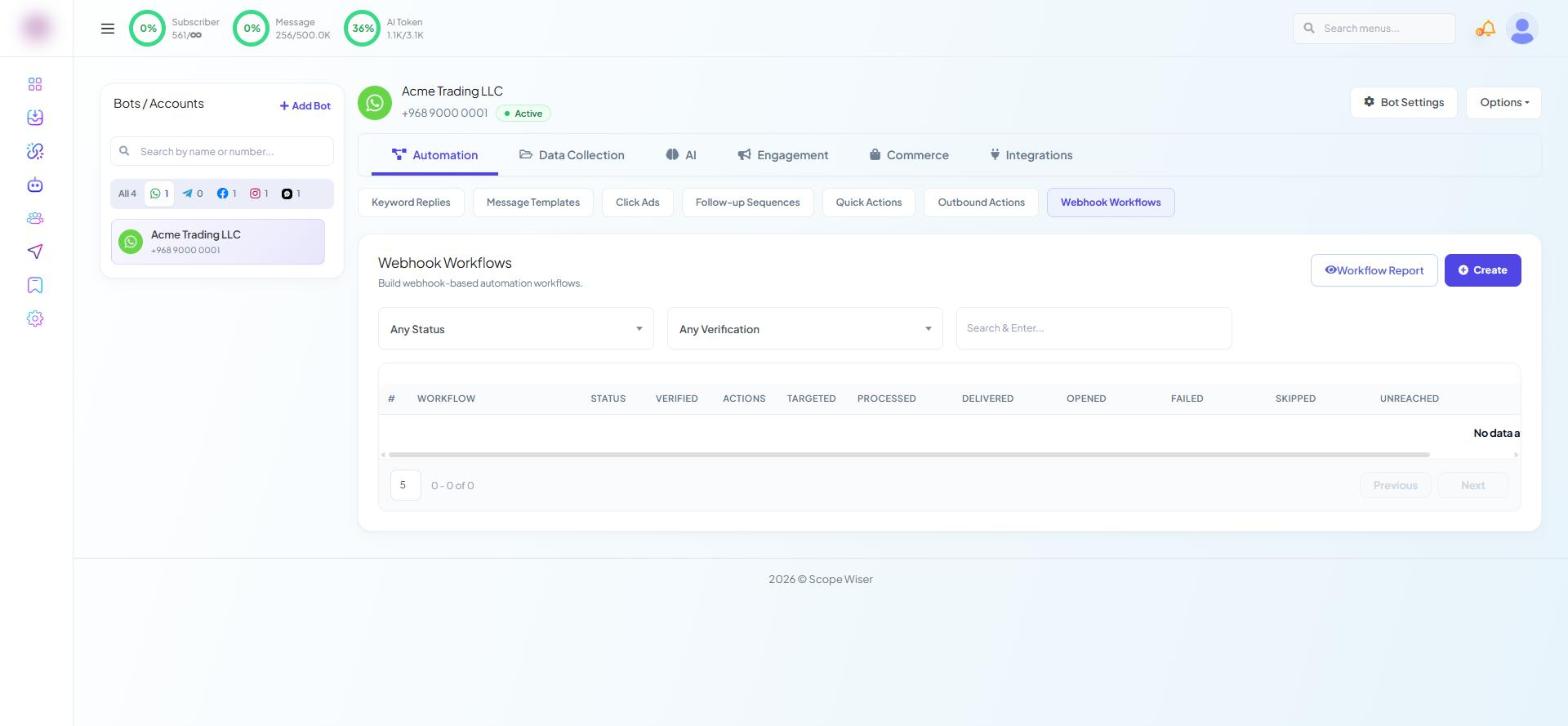
Did the workflow or campaign run? Store Automation campaigns and Webhook Workflows each have their own report. The Workflow Report button on the Webhook Workflows listing opens a per-recipient log —
PHONE NUMBER · STATUS · SCHEDULED AT · DELIVERED AT · OPENED AT · FAILED AT · RESPONSE— and theRESPONSEcolumn usually names the actual problem.Read the right failure column. SKIPPED means your rule blocked it; FAILED means sending broke — see Webhook Workflow: Complete Beginner's Guide.
Is the template approved? A pending, rejected or paused template cannot send. Use Sync Templates to refresh the status rather than trusting what is on screen.
Is the phone number usable? A leading
+, a missing country code, or a landline. Set COUNTRY CODE on a store automation campaign if your store saves local-format numbers; on a webhook workflow, that is what the Trim Left formatter is for.Fixed it? Retry the batch. The three-dot (⋮) menu at the end of the row carries Resend All Failed Webhook, which re-sends everything that errored without asking the store to fire the events again. Download Report gets the whole log out as a file.
One more thing worth doing early: turn off your store's own order confirmation email, or accept that customers get both.
What to do next
Verifying Cash-on-Delivery Orders Over WhatsApp is the natural follow-on — same foundation, but the message asks for a reply and acts on it.