
Verifying Cash-on-Delivery Orders Over WhatsApp
Confirm COD orders before you dispatch them: the Store Automation route for WooCommerce and Shopify, and the Webhook Workflow route with Callback APIs that cancel or note the order.
This article is the recipe for verifying cash-on-delivery orders: a WhatsApp message sent minutes after the order, with confirm and cancel buttons, so you know whether to dispatch. For the wider picture of how payment works across the product — catalogue orders, manual payment, in-chat payment — read Cash on Delivery & Online Payments in Chat.
Two routes, and how to choose
Store Automation is one form. Pick the store, pick COD Verification, pick a template, save. Use it when the standard confirm-or-cancel behaviour is what you want.
Webhook Workflow takes longer and gives you a rule so the message goes only to COD orders, control over what the buttons do to the order in your store, and a delay you choose.
The rule matters more than it sounds. The COD Verification action already knows it is about COD orders; a webhook payload contains every order, and without a rule you will ask people who paid by card to confirm a cash-on-delivery order.
What you need first
A connected store. Connecting WooCommerce or Connecting Shopify.
An approved template with buttons. Under Chatbot Manager → Automation → Message Templates, the Create dropdown offers General Template, WP Template, Mixed Template, Carousel Media Template, Carousel Product Template and Default Template. Default Template creates the system templates, including one worded for COD verification, which is the fastest way to a working setup. Sync Templates refreshes approval status from Meta.
If you write your own, it needs variables for the parts that change — at minimum the product list and the total, and ideally the delivery address — and two quick-reply buttons reading something like "Confirm Order" and "Cancel Order". Approval takes longer for templates with buttons, so submit early.
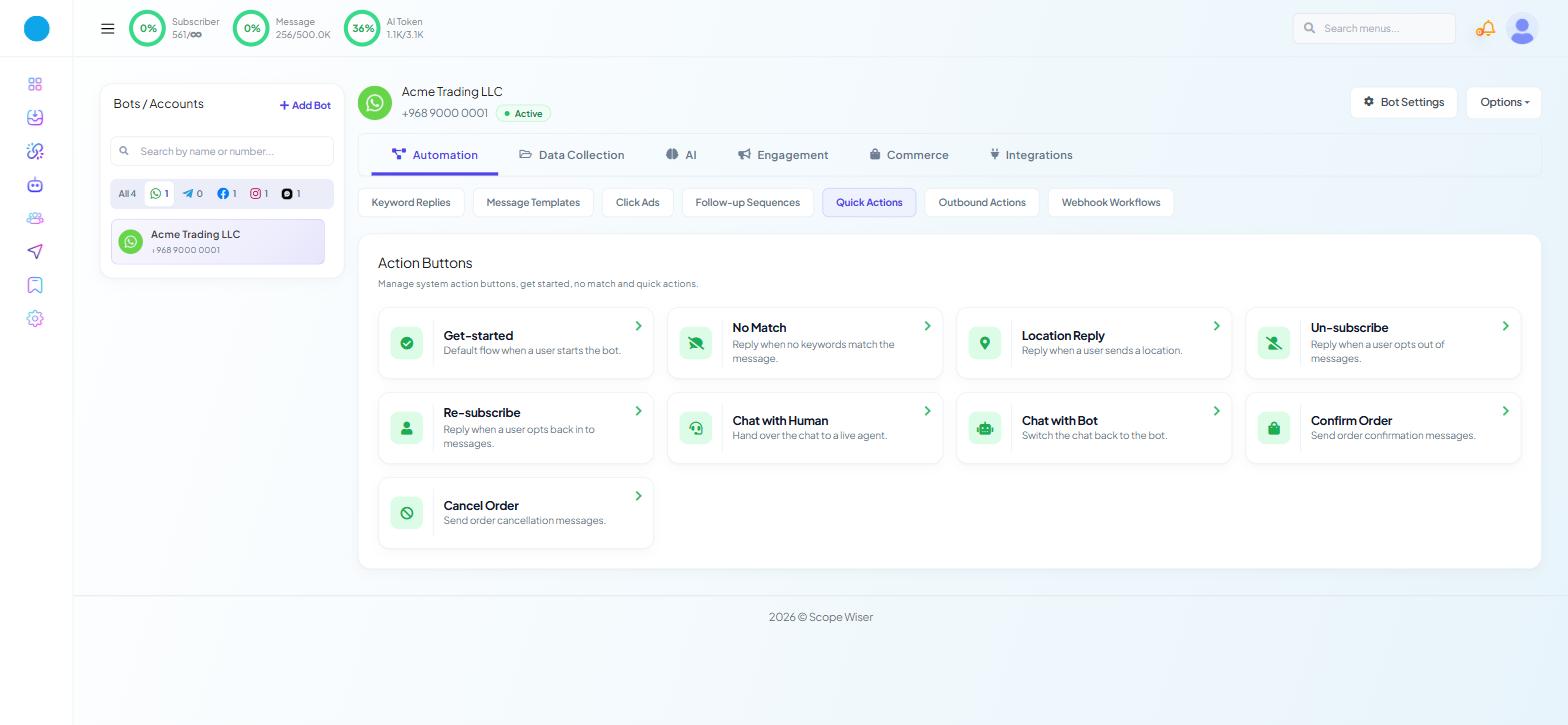
Somewhere for the reply to go. Two system flows already exist. Under Chatbot Manager → Automation → Quick Actions — a page headed Action Buttons, "Manage system action buttons, get started, no match and quick actions." — there are cards for Confirm Order ("Send order confirmation messages.") and Cancel Order ("Send order cancellation messages."). Each opens a prebuilt flow with a Start Bot Flow node, an Actions node carrying the matching template, and a Text node with placeholder wording.
Rewrite both before you launch. The defaults say nothing specific, and these are the two messages every customer reads.
Recipe A: Store Automation
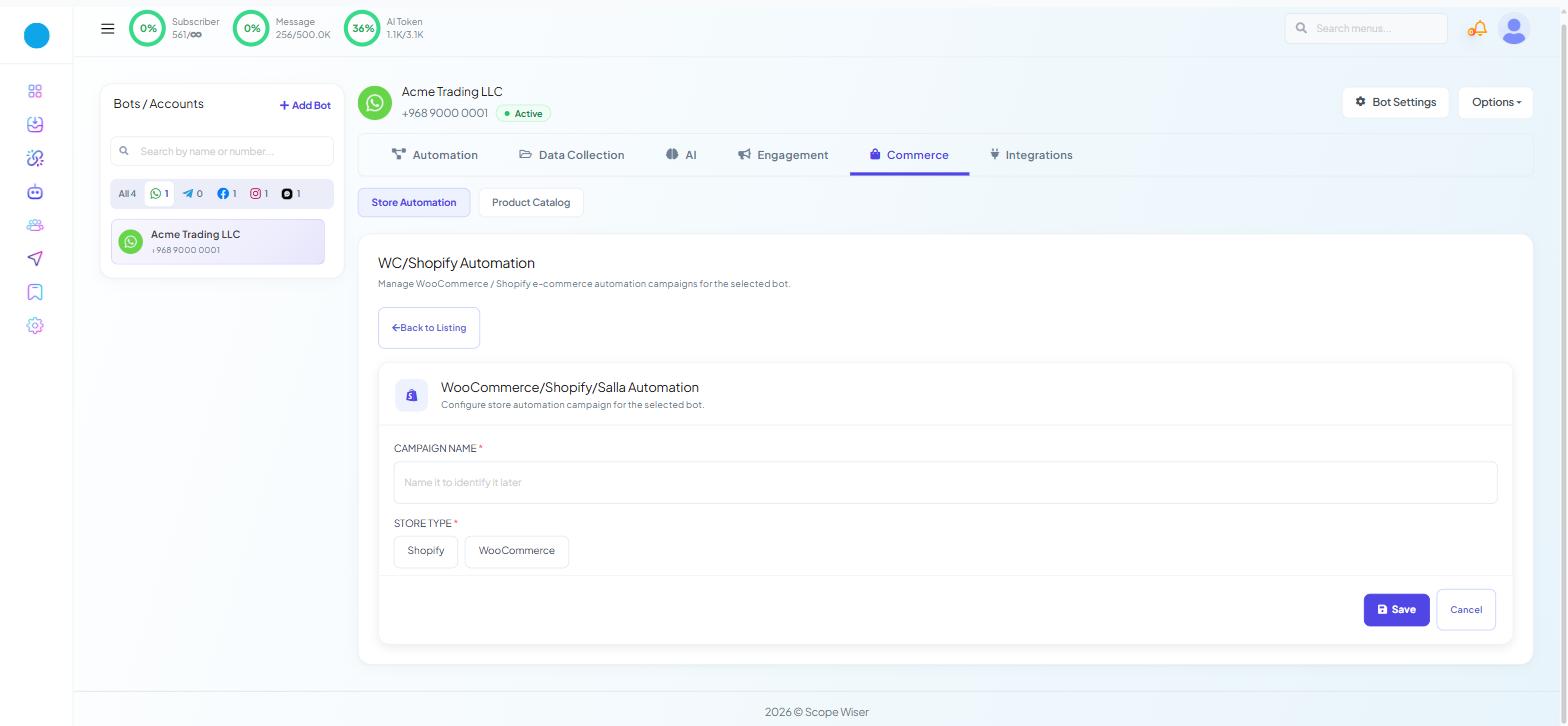
Go to Chatbot Manager → Commerce → Store Automation — headed WC/Shopify Automation — and click Create. Commerce is a WhatsApp-only tab, so make sure a WhatsApp bot is selected.
On the campaign form, CAMPAIGN NAME and STORE TYPE show first; the rest of the fields appear once a store type is picked:
CAMPAIGN NAME * — placeholder "Name it to identify it later". Name it for the store:
Acme store — COD verify.STORE TYPE * — Shopify or WooCommerce.
SELECT STORE API * — your connected store, with an ADD NEW API link beside it.
ACTION * — COD Verification. It is available on both store types.
MESSAGE DELAY (MINUTES) * — one or two minutes. Not zero: the store needs a moment to finish writing the order, and a message that arrives before the confirmation page has loaded looks broken. Not thirty either — the customer has to still remember ordering.
MESSAGE TEMPLATE * — your approved COD template.
COUNTRY CODE (optional, set if phone number does not have any country code) — set it if your checkout stores local-format numbers.
ASSIGN LABEL and ASSIGN SEQUENCE — use both. A label on everyone sent a verification gives you the segment; a sequence chases the ones who never answer.
Save.
Recipe B: Webhook Workflow
Read Webhook Workflow: Complete Beginner's Guide for the model; this is the sequence. You can do almost all of it before a single real order exists, because the workflow will build itself from a pasted sample payload.
1. Prepare the replies the buttons will produce. On a WhatsApp bot these are the Confirm Order and Cancel Order cards under Chatbot Manager → Automation → Quick Actions. Open each, rewrite the Text node, and save. These are what the customer sees after tapping.
2. Create the workflow. Chatbot Manager → Automation → Webhook Workflows → Create. The form starts with Workflow Details alone: set WORKFLOW NAME * and MESSAGE TEMPLATE * to your COD template, check the TEMPLATE INFO preview shows the buttons and variables you expect, then press Create Workflow. Everything else on this page appears only after that.
3. Load a payload. In Configure Webhook Data, open the Custom JSON Body tab, paste a sample COD order payload, and press Run Test — "Click Run Test to load mapping fields without an external trigger." If you would rather work from live data, copy the Webhook Callback URL into your store now (step 5), place a genuine test COD order, and use the Real-time Response tab's Capture Webhook Response button instead. Capturing a payload is also what flips the workflow's VERIFIED column to a green ✓ Yes.
4. Map the fields. Webhook Response Mapping gives you a PHONE NUMBER * row and one row per template variable. Map the phone number, the product list, the total, and the address if your template has one. Attach the Trim Left (+) formatter to the phone row and Concat List Items to the product list — how to build them is in Webhook Workflow: Complete Beginner's Guide → Data Formatters.
5. Add the webhook in the store.
WooCommerce: WooCommerce → Settings → Advanced → Webhooks → Add webhook in WordPress, status active, topic Order created, delivery URL set to the callback URL.
Shopify: Settings → Notifications → Webhooks → Create webhook, event Order creation, format JSON, URL set to the callback URL.
6. Make the buttons act on the order. Open the Callback APIs panel beside the form. It exists to "trigger a third-party API based on webhook data after a WhatsApp message button is clicked", which is precisely what a COD confirmation is. + New opens a drawer asking for Name * and API Action *, and four actions are available:
API Action | Use it for |
|---|---|
Woocommerce Order Note Update | Writing "confirmed by customer on WhatsApp" onto the order so fulfilment can see it |
Woocommerce Order Cancel | Cancelling outright, so nothing is picked or packed |
Shopify Order Tag Update | Tagging the Shopify order as confirmed |
Shopify Order Cancel | Cancelling the Shopify order |
Choosing an action reveals Select Store API * — your connected store, with an Add New API link beside it if it is not connected yet — plus the action's own parameters. Woocommerce Order Note Update adds a Note * field, and its "Read me" panel says plainly what it does: adds a note to an order and updates the order.
Build two: one for confirmation, one for cancellation. Between them, a customer's tap changes the order without anyone on your team reading a message.
7. Add the COD rule. Under Send message based on conditions, click + Add Rule. Set Select Data Field to the payment-method field in your payload, Select Operator to Equal (=) or Contains, and Put Value to whatever your store calls cash on delivery — check the Raw Data panel for the exact spelling rather than guessing, because cod and Cash on delivery are not the same string. Then choose Send message only if all of the following rules satisfy. Without this rule you message everybody.
8. Set the delay and the follow-up actions. Send message with a delay is a single row — Wait 0 minutes after a webhook triggers — and one or two minutes is right here. Under Actions following successful webhook call, use ASSIGN LABEL to mark everyone sent a verification, ASSIGN SEQUENCE to enrol the ones you will chase, and SUBSCRIBER NAME to pull the customer's name out of the payload so the inbox shows people rather than numbers.
9. Save Workflow and test with one real COD order, then check the workflow report before checking WhatsApp.
Buttons are set up in two places: Quick Actions (what the customer sees) and Callback APIs (what changes in the store). The AI Workflow Assistant beside the form can propose the mapping and the rule for you — see Webhook Workflow: Complete Beginner's Guide.
If you would rather offer the customer a way to pay now instead of on delivery, see Payment Gateways: TAP, Instamojo & Razorpay.
Chasing non-replies
In ASSIGN SEQUENCE, pick a sequence that sends one reminder a few hours later. Label confirmed and unanswered orders separately.
When it goes wrong
Messages go to prepaid customers too. No COD rule on the webhook workflow, or the rule points at the wrong field.
The message arrives before the order details are ready. Delay is set to zero. One or two minutes.
Nothing arrives at all. Check the store's webhook log, then the campaign or workflow report, then the template's approval status, then the phone number format.
The workflow ran but nothing sent. SKIPPED means your COD rule filtered the message out; FAILED means the send broke — see Webhook Workflow: Complete Beginner's Guide. The Raw Data panel shows the payment-method value that actually arrived, which is usually spelled differently from what the rule expects.
Buttons appear but tapping does nothing. The Confirm Order and Cancel Order flows under Automation → Quick Actions are empty or were never rewritten.
Confirming does not change anything in the store. No Callback API is configured for that outcome, its Select Store API points at the wrong store, or the store credentials are read-only. On Shopify that means a custom app without write access to Orders and Order editing.
A batch failed for a reason you have since fixed. The three-dot (⋮) menu at the end of the row on the Webhook Workflows list carries Resend All Failed Webhook, and Download Report if you want the per-recipient log as a file.
What to do next
Abandoned Cart Recovery is the other half of the same problem — orders that never became orders. It uses the same foundation and, on WooCommerce, a route you have not needed until now.