
Cash on Delivery & Online Payments in Chat
Where catalogue and store orders appear in Scope Wiser and how to confirm them: the two order tables, COD Verification in Store Automation, the Confirm Order and Cancel Order flows, Callback APIs that write the answer back to your store, and what WhatsApp Pay adds where it is available.
Most orders are paid on delivery or by transfer. This guide shows where those orders appear and how to confirm them.
Never ask for card numbers in chat. Payment goes through the payment path — an in-chat payment configuration where your market has one, or an order recorded against a proof of payment in the Catalog Orders (Manual Payment) table.
Scope Wiser separates the work across three places:
Where | What it handles |
|---|---|
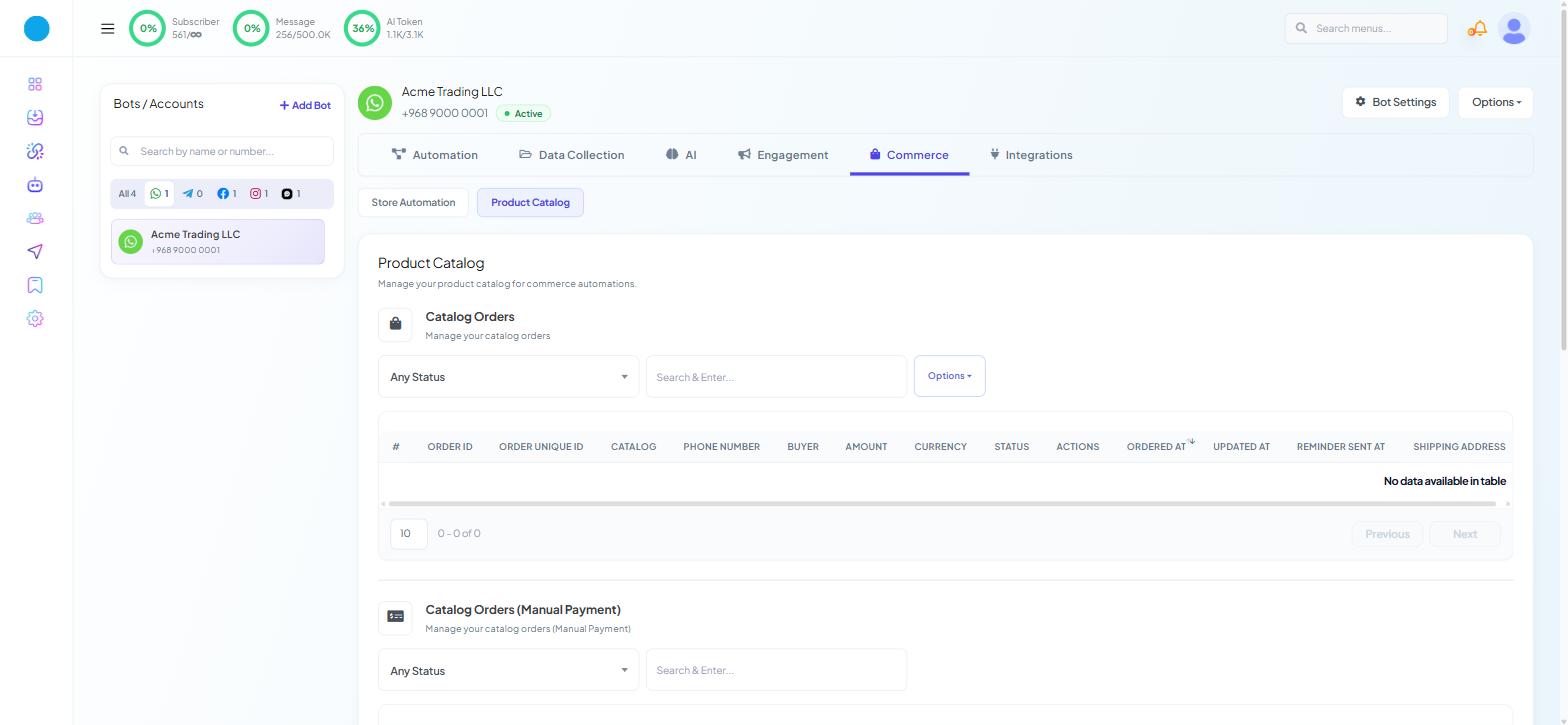
Commerce → Product Catalog → Catalog Orders | Orders placed against your Meta catalogue |
Commerce → Product Catalog → Catalog Orders (Manual Payment) | Catalogue orders settled outside an automated payment path |
Commerce → Store Automation | Messages driven by events in a connected Shopify or WooCommerce store — including COD verification |
The two order tables, and why they differ
Catalog Orders — "Manage your catalog orders" — carries ORDER ID, ORDER UNIQUE ID, CATALOG, PHONE NUMBER, BUYER, AMOUNT, CURRENCY, STATUS, ACTIONS, ORDERED AT, UPDATED AT, REMINDER SENT AT and SHIPPING ADDRESS. It has an Any Status filter, a Search & Enter... box and an Options dropdown.
Catalog Orders (Manual Payment) — "Manage your catalog orders (Manual Payment)" — has a different shape: CATALOG, BUYER, AMOUNT, CURRENCY, ATTACHMENT, STATUS, ACTIONS, ORDERED AT and ADDITIONAL INFO.
The ATTACHMENT column is the whole story. Manual-payment orders are ones where the customer sends you evidence — a transfer receipt, a screenshot — rather than paying through a connected gateway, and that evidence is attached to the order. If your business takes bank transfers or mobile money, this is the table you will live in.
Check both tables when looking for an order, and cover both in any export or report you build.
If WhatsApp Pay is available in your market
WhatsApp Pay lets a customer pay for a catalogue order inside the chat. It is set up in Meta's own tools, not in Scope Wiser, and it is not available in every country. Open Meta's business tools for the business portfolio that owns your WhatsApp Business Account and look for a payment configuration option there. If there is none, use cash on delivery or manual payment instead — those are the more common setup worldwide.
Prices and currency come from the product data in Meta Commerce Manager, not from anything you type in Scope Wiser.
What the customer experiences, once WhatsApp Pay is configured:
They browse the products your flow sent and add what they want.
They place the order.
For a physical product they are asked to confirm a delivery location. Digital products skip this step.
They receive an order summary with a payment action.
They pay without leaving WhatsApp, and the order status updates.
The most common surprise is step 3. If you sell something that does not get delivered — a booking, a download, a service — and your buyers are being asked for an address, the catalogue is treating the item as a physical product. That is a product-type setting in Commerce Manager.
When it does not work:
No payment step appears in the chat. The catalogue is not attached to a payment configuration, or the configuration has not passed Meta's test.
Customers are asked for an address for a digital item. Product type on that catalogue is set to physical.
The order appears but the amount is wrong. Prices come from the Meta catalogue. Fix them in Commerce Manager.
It worked and then stopped. Check the payment configuration on Meta's side before anything in Scope Wiser. Provider authorisations can be revoked from the provider's end without notice here.
The option is not available at all in Meta's tools. WhatsApp Pay is not enabled for your market or your account. Use the alternatives on this page instead.
Confirming an order: the two quick actions
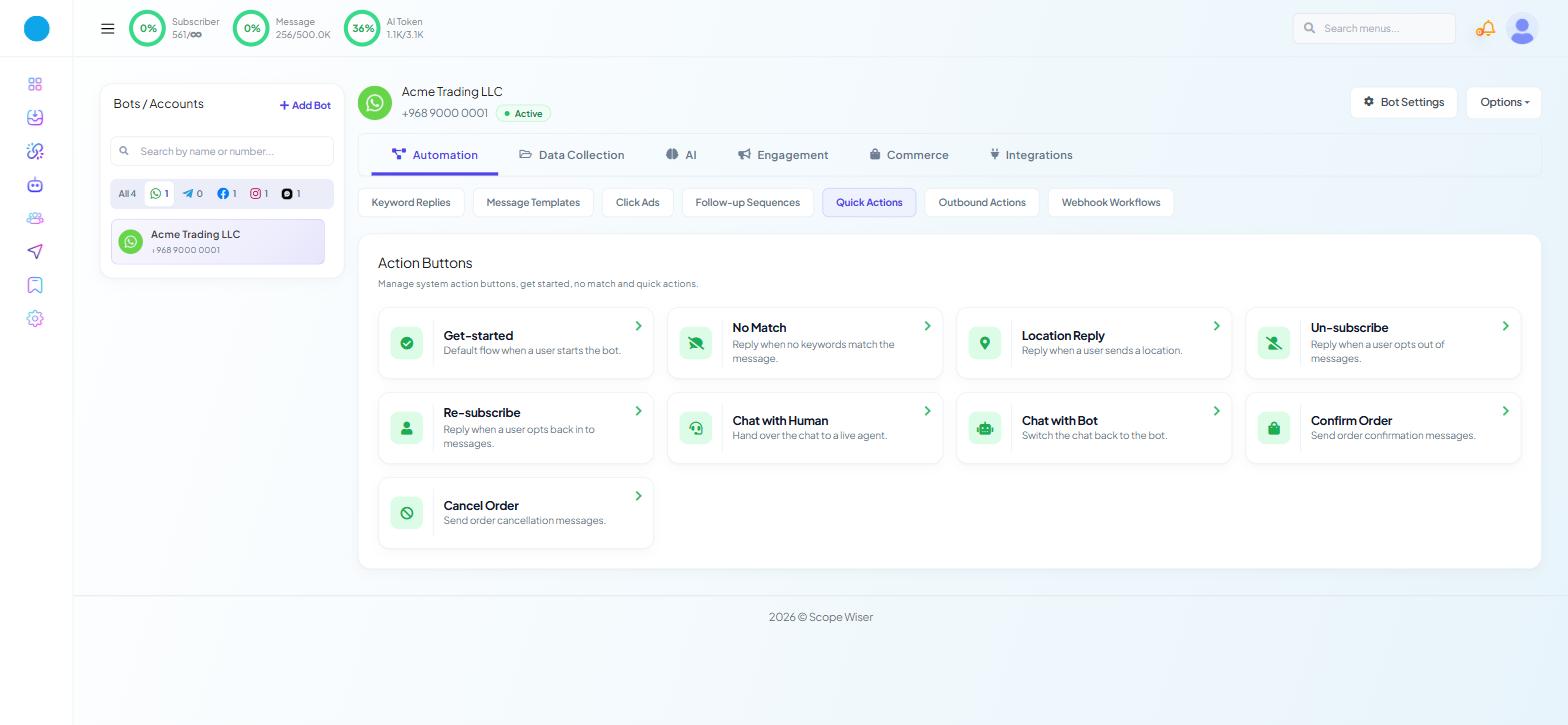
Whatever the payment method, the buyer should hear something immediately. Two system flows exist for exactly this, under Chatbot Manager → Automation → Quick Actions, on a page headed "Action Buttons — Manage system action buttons, get started, no match and quick actions.":
Confirm Order — "Send order confirmation messages."
Cancel Order — "Send order cancellation messages."
Each card opens its own flow in the Flow Builder. They arrive prebuilt — a Start Bot Flow node carrying the quick action, an Actions node holding the associated template, and a Text node with default wording along the lines of "Thank you for confirming the order. Your order is being prepared and will arrive on schedule."
Rewrite both. A confirmation that earns its place says three things: what was ordered, when it will arrive, and what to do if that is wrong. Cancellations should say whether any money is coming back and how long it takes.
You are not limited to text. Add an Interactive block with buttons if you want a reply, or a User Input Flow if you still need a delivery address or a preferred time.
COD verification for store orders
If your orders come from a connected Shopify or WooCommerce store rather than from a Meta catalogue, Commerce → Store Automation is where the message that verifies them is built. Your role needs WHATSAPP - WORDPRESS/SHOPIFY INTEGRATION, which is its own toggle under Control Panel → User Permission. The page is headed WC/Shopify Automation — "Manage WooCommerce / Shopify e-commerce automation campaigns for the selected bot." — and lists campaigns with CAMPAIGN NAME, STORE TYPE, STATUS and ACTIONS.
Click Create. The card that opens is described as "Configure store automation campaign for the selected bot." Only two fields show at first.
CAMPAIGN NAME * — placeholder "Name it to identify it later".
STORE TYPE * — two buttons, Shopify and WooCommerce. The rest of the form appears once you pick one.
SELECT STORE API * — the saved connection holding your store's credentials, with an ADD NEW API link beside it for a store you have not connected yet.
ACTION * — what triggers this campaign. On WooCommerce the options are Order Notification, COD Verification and Order Update Notification. On Shopify there is a fourth, Abandoned Cart Recovery, and it is the default. For COD verification, choose COD Verification.
MESSAGE DELAY (MINUTES) * — defaults to
0for WooCommerce and30when you select Shopify. Keep it short enough that the customer still remembers ordering.MESSAGE TEMPLATE * — the approved WhatsApp template to send, with a refresh icon and a Create button beside it. Use a template with a reply button so confirming costs one tap.
COUNTRY CODE (optional, set if phone number does not have any country code) — set this if your store saves local-format numbers. Getting it wrong is the most common reason a store automation sends nothing at all.
ASSIGN LABEL and ASSIGN SEQUENCE — optional. Labelling everyone who received a COD verification gives you a segment; a sequence lets you chase a non-reply.
Click Save.
Writing the customer's answer back to the store
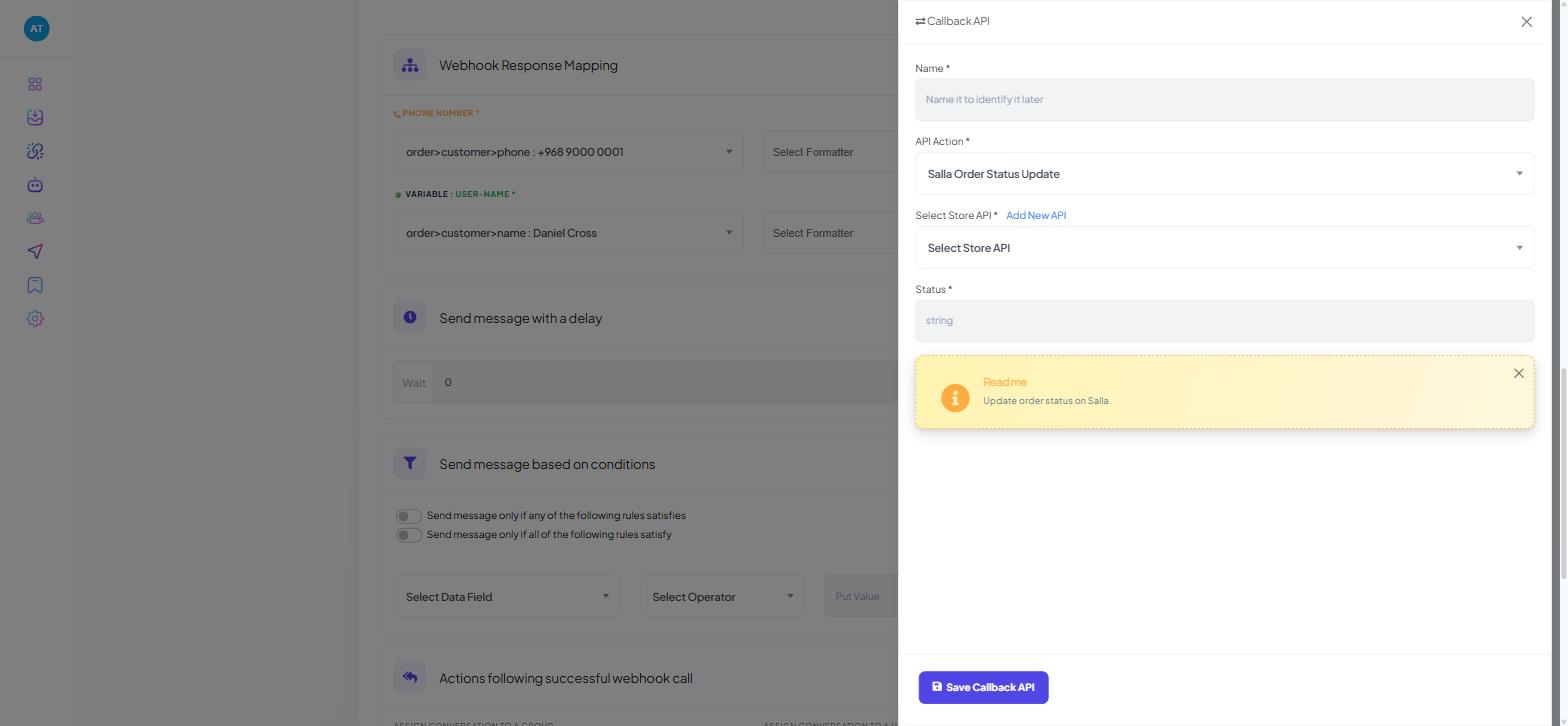
Automation → Webhook Workflows → open your workflow → Callback APIs → + New → Name → API Action (for example Woocommerce Order Note Update) → Select Store API → Save. This updates the order in your store when the customer taps Yes or No.
For developers
The Callback APIs panel is described as "Trigger a third-party API based on webhook data after a WhatsApp message button is clicked". Behind + New, the Callback API drawer takes a Name * and an API Action *. Four actions exist:
Shopify Order Cancel and Shopify Order Tag Update
Woocommerce Order Cancel and Woocommerce Order Note Update
Choosing one reveals Select Store API * — the same store-credential field as on a store automation campaign, with the same Add New API link beside it — plus whatever that action needs of its own. Woocommerce Order Note Update adds a Note * field and a short "Read me" panel: "Add a note to an order and update the order."
Cutting down orders that were never real
COD attracts orders that nobody intends to accept. Three things reduce that, and none of them require a payment gateway:
Ask for one confirmation. A verification message with a single reply button converts a passive order into an active one, and a callback API can cancel the ones that come back as a no. Orders never confirmed at all can be held rather than dispatched.
Chase once, then stop. Use ASSIGN SEQUENCE on the campaign to send one follow-up.
Label the pattern. Assign a label on confirmation, and another where the confirmation never comes. Over a few weeks that becomes a list you can treat differently — prepayment only, or a phone call before dispatch.
Where orders end up
Nobody packs boxes from a chatbot dashboard, so route orders out. Sending Catalog Purchase Data to Google Sheets covers the Google connection, and Automation → Outbound Actions or Automation → Webhook Workflows push order events to anything else you run.
When it goes wrong
Store automation sends nothing. Check COUNTRY CODE first — a stored number without a country code cannot be delivered to. Then check the template is approved.
The template is listed but never sends. Pending templates cannot be sent until WhatsApp approves them.
Confirmations go out twice. A store automation campaign and a quick action flow are both firing on the same event. Disable one.
The buyer confirmed but the store did not change. No callback API is attached to the button, or it points at the wrong Select Store API.
An order is in neither table. Catalogue orders and store orders are different objects with different homes. A Shopify order will never appear under Catalog Orders.
Abandoned Cart Recovery is missing. It is offered for Shopify, not WooCommerce.
What to do next
Where your orders come from a store rather than a catalogue and the connection itself is misbehaving, Fixing WooCommerce API Errors is the more useful page. To build the flow that puts products in front of a customer in the first place, see Triggering Catalog Products From a Bot Flow.