
Creating a WhatsApp Flows Form
Build a WhatsApp Flow in Scope Wiser using either the classic Whatsapp Flows Form builder or Flows Studio (Beta): whether your form belongs in a Flow at all, every field explained, and when to use which builder.
Two things cause almost all the confusion on this page, so let us clear both before touching a builder.
First: a WhatsApp Flow is not a User Input Flow. They sit next to each other on the same tab and they are different features.
WhatsApp Flows | User Input Flows | |
|---|---|---|
What the customer sees | A form screen rendered inside WhatsApp, with fields and a submit button | Questions arriving as ordinary chat messages, answered one at a time |
Whose feature it is | Meta's, built into WhatsApp | Scope Wiser's |
Channels | WhatsApp only | WhatsApp, Facebook, Instagram, Webchat |
Approval | Categorised and published through Meta before it can be sent | None — save it and it runs |
Best at | Long structured forms someone fills in one go | Conversational qualification, branching on answers |
If your form has to work on Facebook or Webchat, stop here and build a User Input Flow instead.
Second: WhatsApp Flows are not under Commerce. They live under Chatbot Manager → Data Collection → WhatsApp Flows, alongside User Input Flows. The Commerce tab holds Store Automation and Product Catalog only.
Should this be a WhatsApp Flow?
Your form | Where it belongs |
|---|---|
Long enquiry from an existing WhatsApp contact | WhatsApp Flow |
Booking or appointment request | WhatsApp Flow |
Post-purchase details — delivery preference, sizing, a gift note | WhatsApp Flow |
Support intake needing an attachment | WhatsApp Flow, using Photo upload or Document upload |
Two or three questions that should feel like a chat | User Input Flow |
Anything that must work on Facebook, Instagram or Webchat | User Input Flow |
Public sign-up from search or an ad landing page | Web form — then trigger a Flow from it |
Anything needing payment, signature or a custom widget | Web form |
For a public page, collect a name and a WhatsApp number on the page and send the real form as a Flow — Triggering a Flows Form From Your Website is that build.
The WhatsApp Flows page
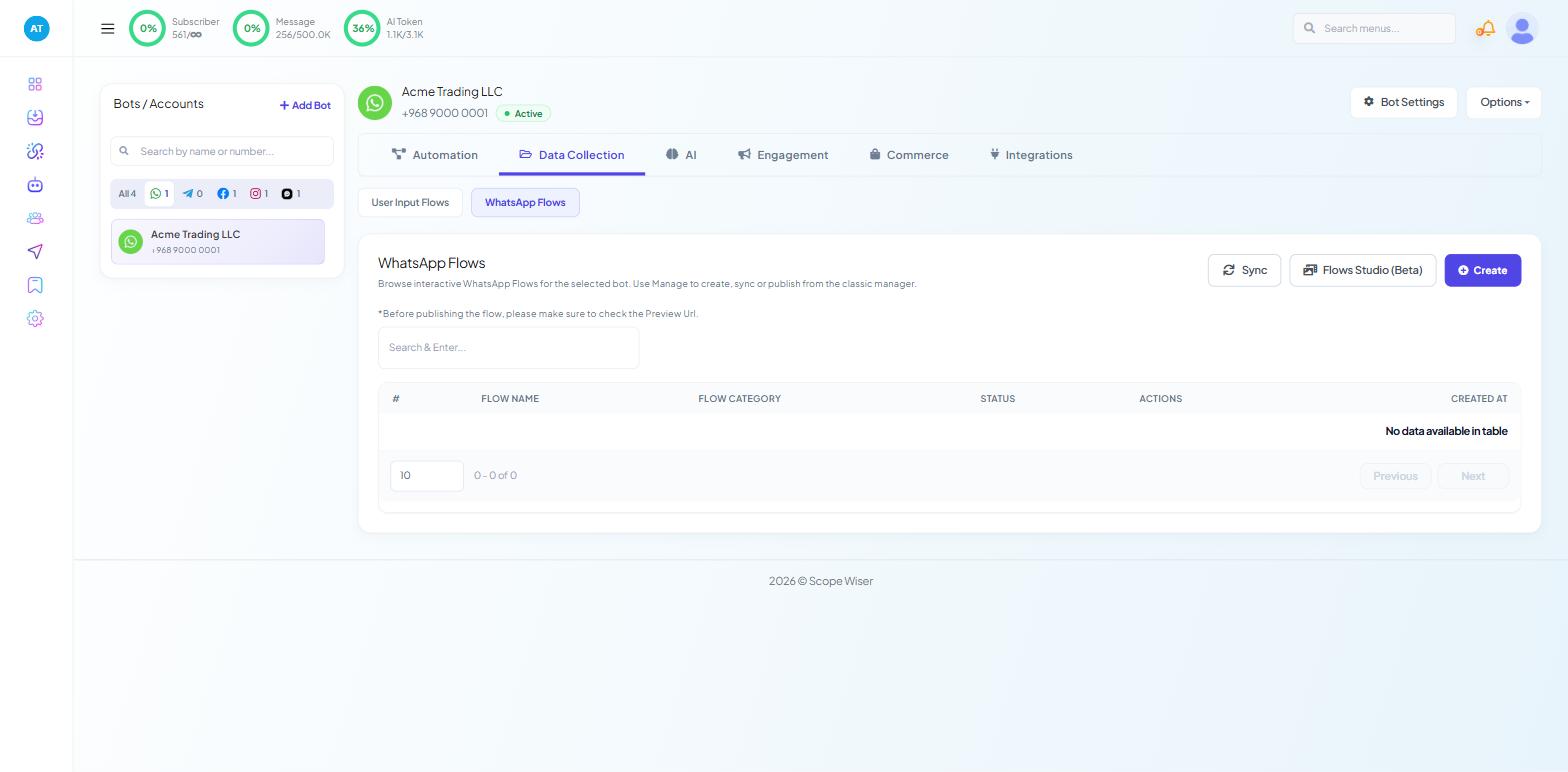
Select your WhatsApp bot in Chatbot Manager, open Data Collection, then WhatsApp Flows. If there is no WhatsApp Flows entry there, check the role before the plan: WHATSAPP - FLOWS is its own toggle under Control Panel → User Permission, and a team member whose role lacks it sees nothing here. The page is headed "WhatsApp Flows — Browse interactive WhatsApp Flows for the selected bot. Use Manage to create, sync or publish from the classic manager."
Three actions sit at the top:
Sync — reconciles the list with what Meta holds
Flows Studio (Beta) — the multi-screen builder
+ Create — the classic single-screen form builder
The list carries FLOW NAME, FLOW CATEGORY, STATUS, ACTIONS and CREATED AT, and a line under the heading warns: "*Before publishing the flow, please make sure to check the Preview Url." Always Preview before Publish.
Builder 1: the classic Whatsapp Flows Form
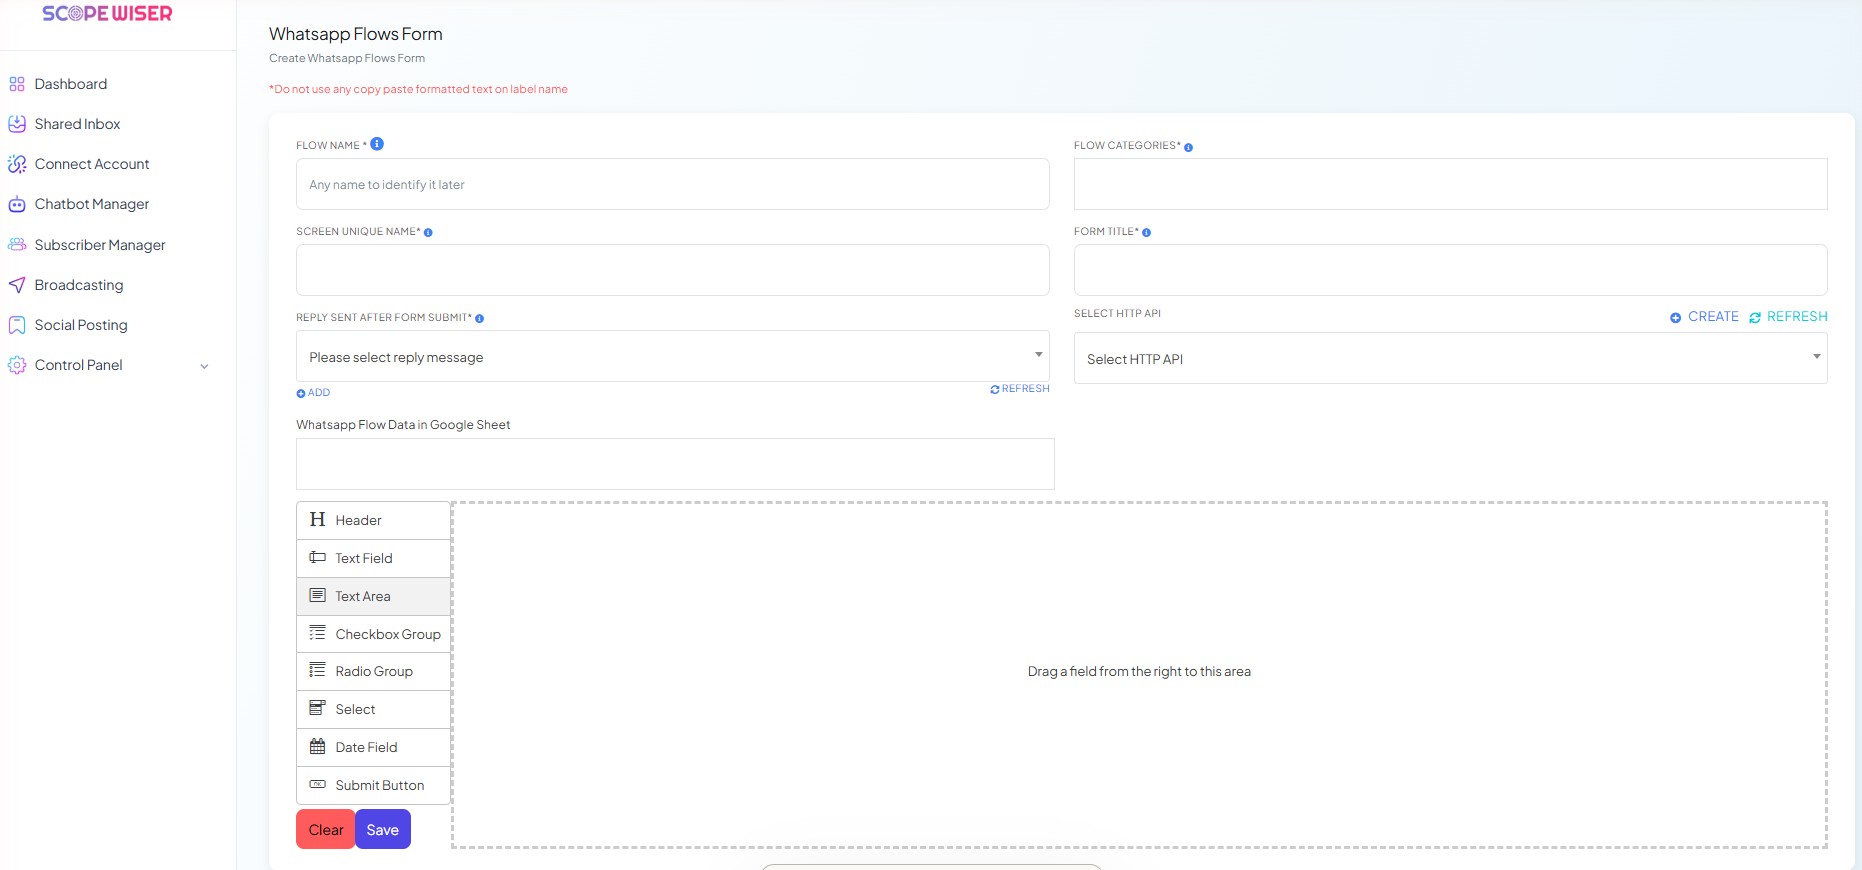
+ Create opens Whatsapp Flows Form — "Create Whatsapp Flows Form". This is a drag-and-drop builder for a single form screen, and it is the right choice for most first flows.
A red warning sits under the heading: "*Do not use any copy paste formatted text on label name". Pasting from a word processor carries invisible formatting that breaks the field label. Type labels by hand, or paste through a plain-text editor first.
Fill in the flow settings.
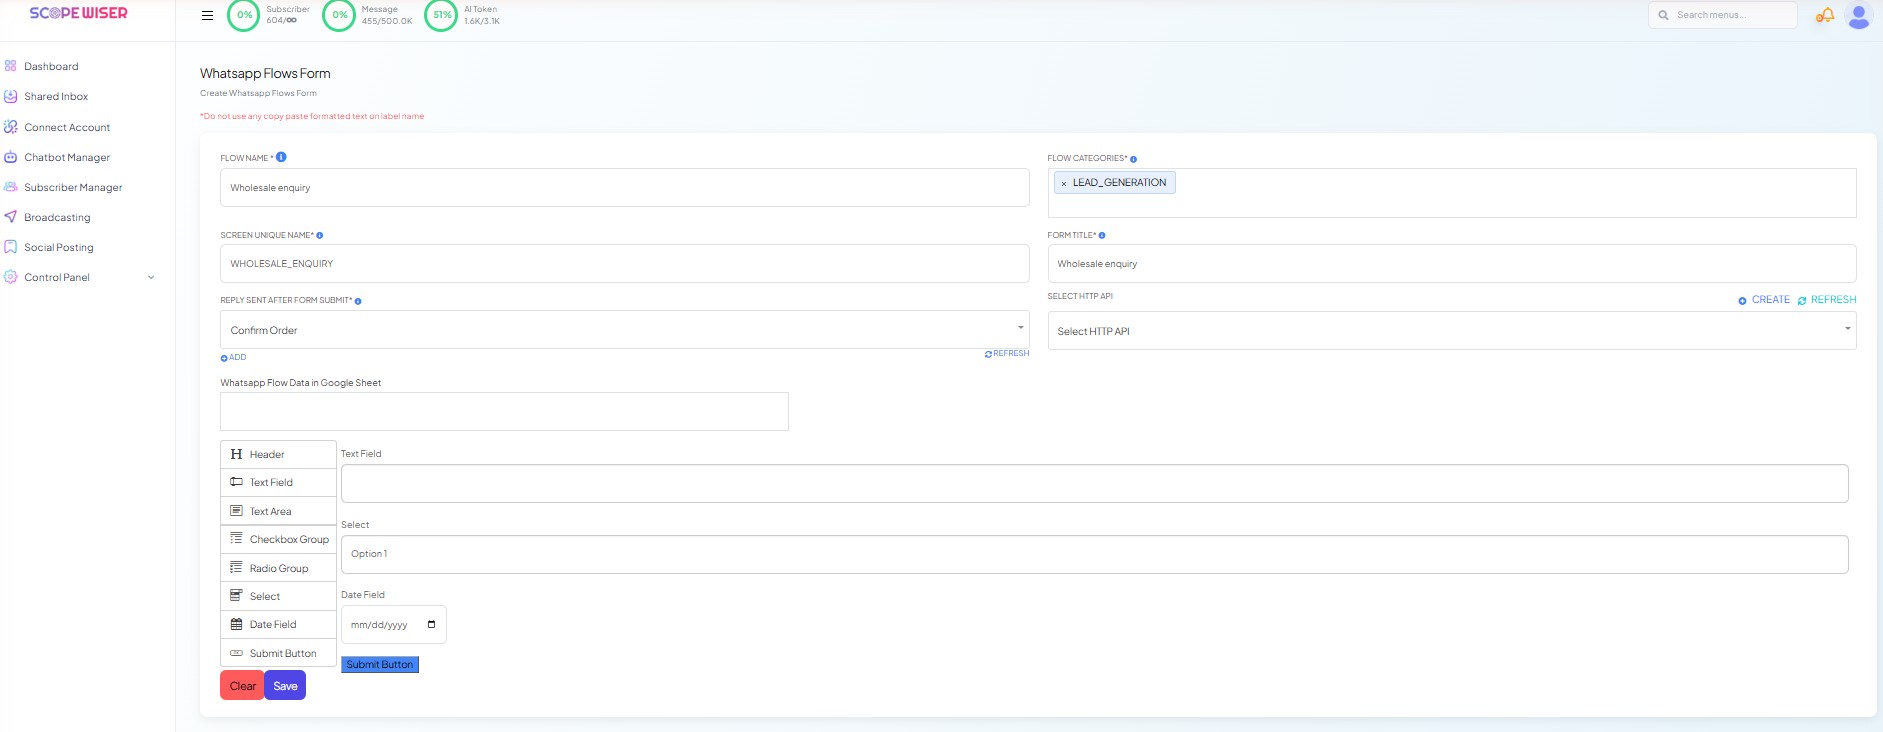
FLOW NAME * — placeholder "Any name to identify it later". Names must be unique across your flows. Include the purpose and the audience: "Wholesale enquiry" beats "Form 2".
FLOW CATEGORIES* — the category Meta files the flow under. This is not decoration; it tells Meta what the form is for.
SCREEN UNIQUE NAME* — an internal identifier for the screen. No spaces. A space here produces an error rather than a tidy label.
FORM TITLE* — the title the customer reads at the top of the form.
REPLY SENT AFTER FORM SUBMIT* — dropdown, "Please select reply message". What the bot says once the form comes back. An ⊕ ADD and a ⟳ REFRESH button sit beneath it so you can create the reply without leaving the page.
SELECT HTTP API — leave blank unless a developer has set up an HTTP API for you.
Whatsapp Flow Data in Google Sheet — where submissions are written to a connected sheet.
Build the form. The field palette offers Header, Text Field, Text Area, Checkbox Group, Radio Group, Select, Date Field and Submit Button. Drag each one into the canvas, whose empty state reads "Drag a field from the right to this area".
A form without a Submit Button cannot be saved. If Save appears to do nothing, that is almost always why.
Clear empties the canvas. Save finalises the flow.
Builder 2: Flows Studio (Beta)
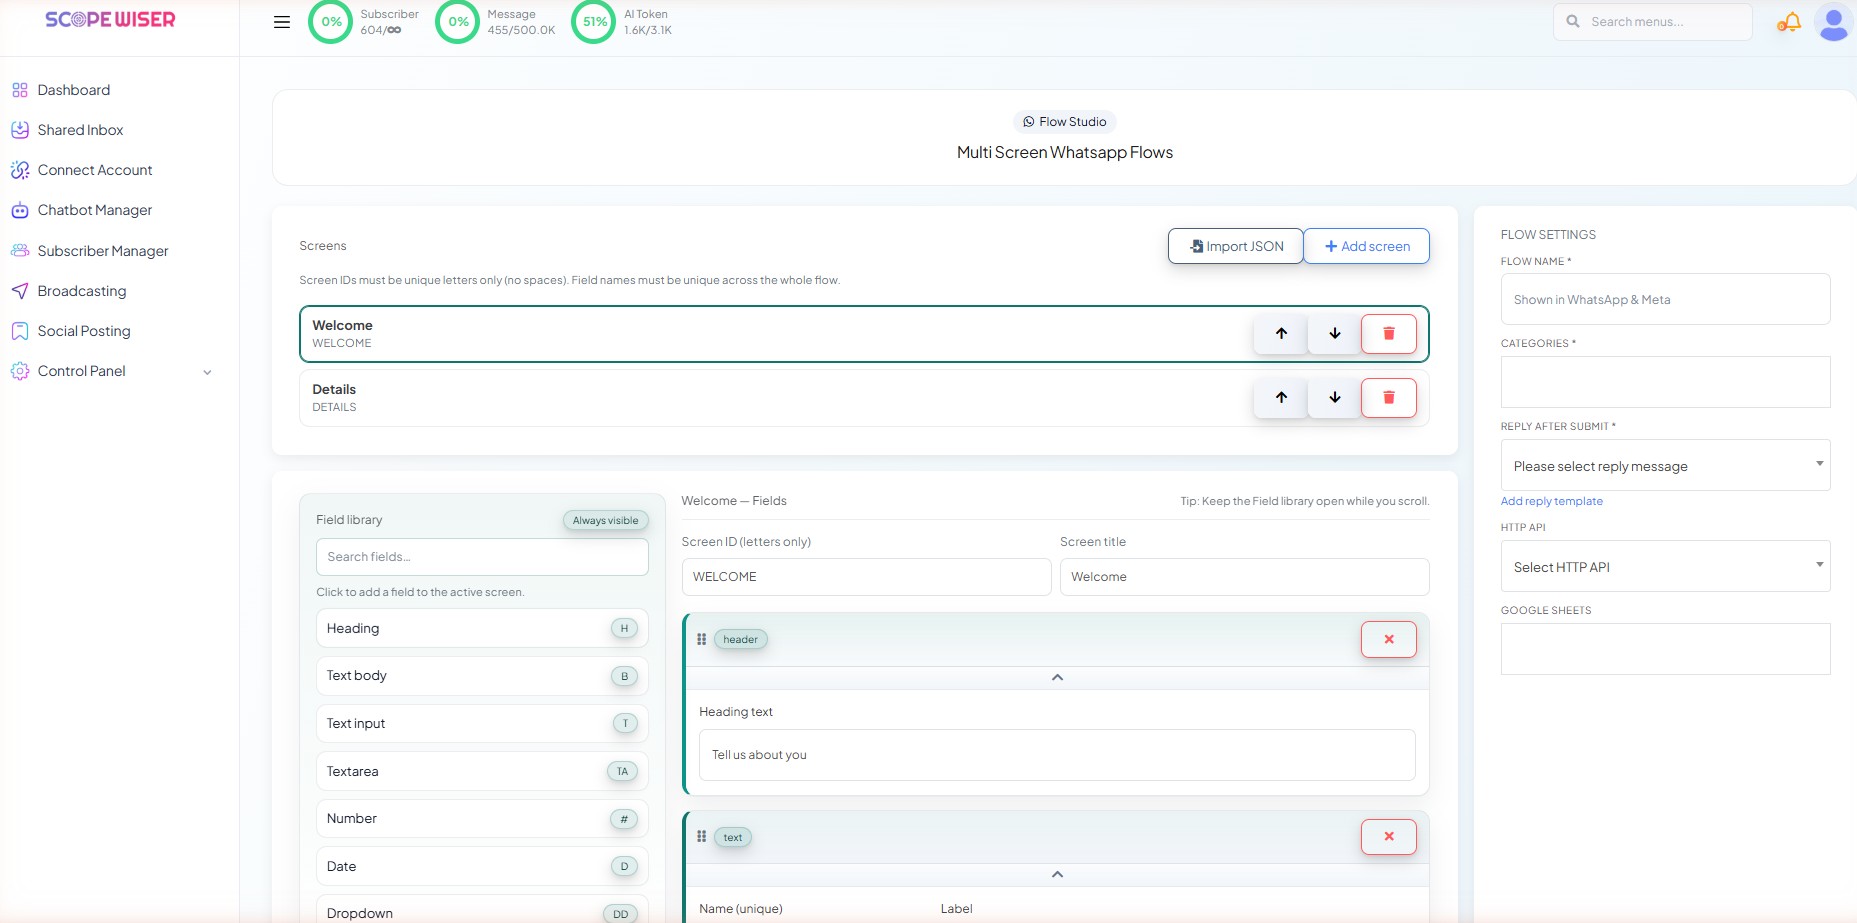
Flows Studio (Beta) opens Multi Screen Whatsapp Flows, badged Flow Studio. Use this when one screen is not enough — an application that asks for details, then documents, then a confirmation.
The layout is three columns.
Left — Screens. Each screen is a row you can reorder with the up and down arrows or remove with the red bin. + Add screen adds another. Import JSON is for developers; skip it. The rule on the panel is explicit: "Screen IDs must be unique letters only (no spaces). Field names must be unique across the whole flow." Two screens cannot both have a field called name.
Each screen has a Screen ID (letters only) and a Screen title. The active screen carries a green left border.
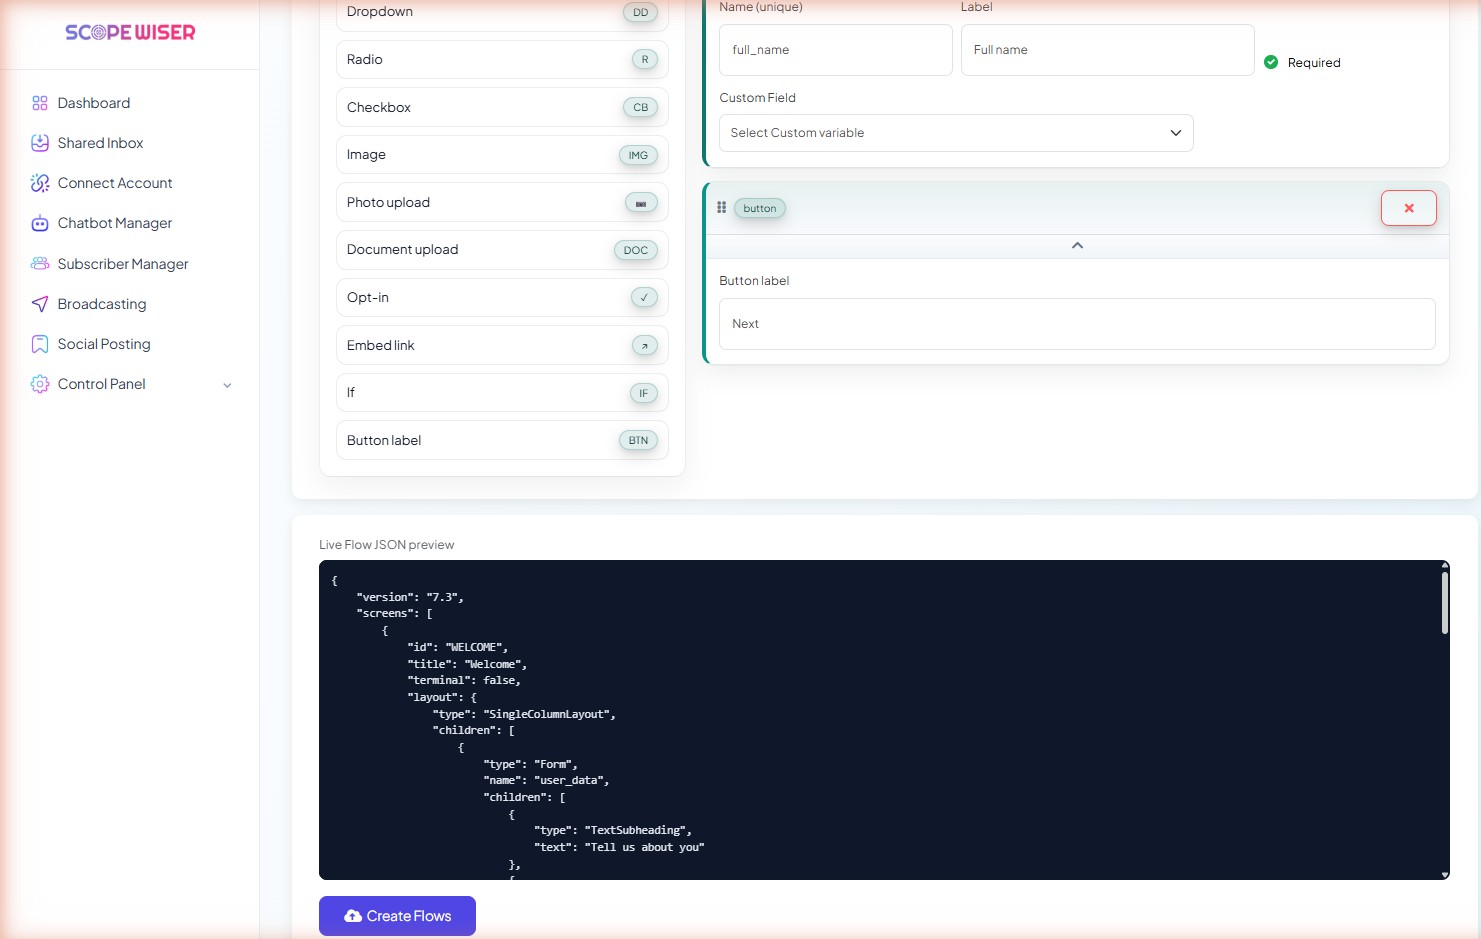
Middle — Field library and the active screen's fields. "Click to add a field to the active screen." The library covers Heading, Text body, Text input, Textarea, Number, Date, Dropdown, Radio, Checkbox, Image, Photo upload, Document upload, Opt-in, Embed link, If and Button label, with a Search fields... box and an Always visible pill that keeps the library pinned while you scroll.
That library is wider than the classic builder's. Photo upload and Document upload let a customer attach evidence — a prescription, a proof of address, a damaged item. Opt-in captures consent as a field. If is the conditional.
Each field block expands to show Name (unique) (placeholder full_name), Label (placeholder Full name), a Required toggle and a Custom Field dropdown — "Select Custom variable" — which is how an answer lands on the subscriber's profile instead of only in the submission record. Map every field you will want to segment or personalise on later; adding it retrospectively means re-asking the customer.
The button block holds Button label, defaulting to Next.
Right — FLOW SETTINGS. FLOW NAME * ("Shown in WhatsApp & Meta"), CATEGORIES *, REPLY AFTER SUBMIT *, HTTP API and GOOGLE SHEETS — the same settings as the classic builder, under slightly shorter names.
Live Flow JSON preview. The dark panel is the technical version of your form; ignore it except to check that no two fields share a name.
Create Flows at the bottom submits the flow.
Which builder to use
Classic (+ Create) — one screen, standard field types, fastest route to something working.
Flows Studio (Beta) — several screens, conditional logic, uploads, opt-in. It is marked Beta, so build something small in it before you rely on it for a campaign.
You cannot mix them in one flow. Pick the builder that matches the form you actually need.
Previewing and publishing
A saved flow appears in the WhatsApp Flows list with its FLOW CATEGORY and STATUS. In that row, go to ACTIONS → the preview icon, check the form, then ACTIONS → the publish icon. Preview first, publish second.
Sending the flow to someone
A published flow does nothing until a conversation delivers it. In the WhatsApp Flow Builder, Whatsapp Flows is a block in the DATA COLLECTION group of the palette — note the spelling, one capital in Whatsapp. Drop it into a flow at the point where the form should appear.
Collecting Data With Multi-Step Flows Forms covers the other delivery routes: keywords, template buttons, broadcasts and quick actions.
What to do next
Build one, preview it, send it to your own number, and only then wire it into a campaign. If it does not arrive or does not trigger, Flows Form Troubleshooting works through the usual causes in order.