
Triggering Catalog Products From a Bot Flow
Send WhatsApp catalogue products from a flow in Scope Wiser: the keyword trigger, the Interactive block and its E-commerce port, and how to test the browse-to-order path end to end.
A connected catalogue sits there doing nothing until a flow sends it. The mechanism on WhatsApp is the Interactive block: it carries the message a customer reads, and it carries the port that attaches products to that message.
This is a WhatsApp-only build. The Flow Builder palette differs per channel, and Interactive appears only on WhatsApp — Facebook, Instagram and Webchat get Generic Template and Carousel instead, neither of which can send a Meta catalogue.
Before you build
The catalogue is integrated, and its row shows in Chatbot Manager → Commerce → Product Catalog → Catalog Manager. If it is not there, do Connecting Your WhatsApp Catalog first.
You know which products you want to show. Pick the handful of products you want to show first.
A test number that is not your own bot number. You cannot meaningfully test a shopping flow from the account that sends it.
Step 1: Create the flow and give it a trigger
From Chatbot Manager → Automation → Keyword Replies, click + Create. The Flow Builder opens with a single Start Bot Flow node on the canvas whose outlet is Compose Next Message.
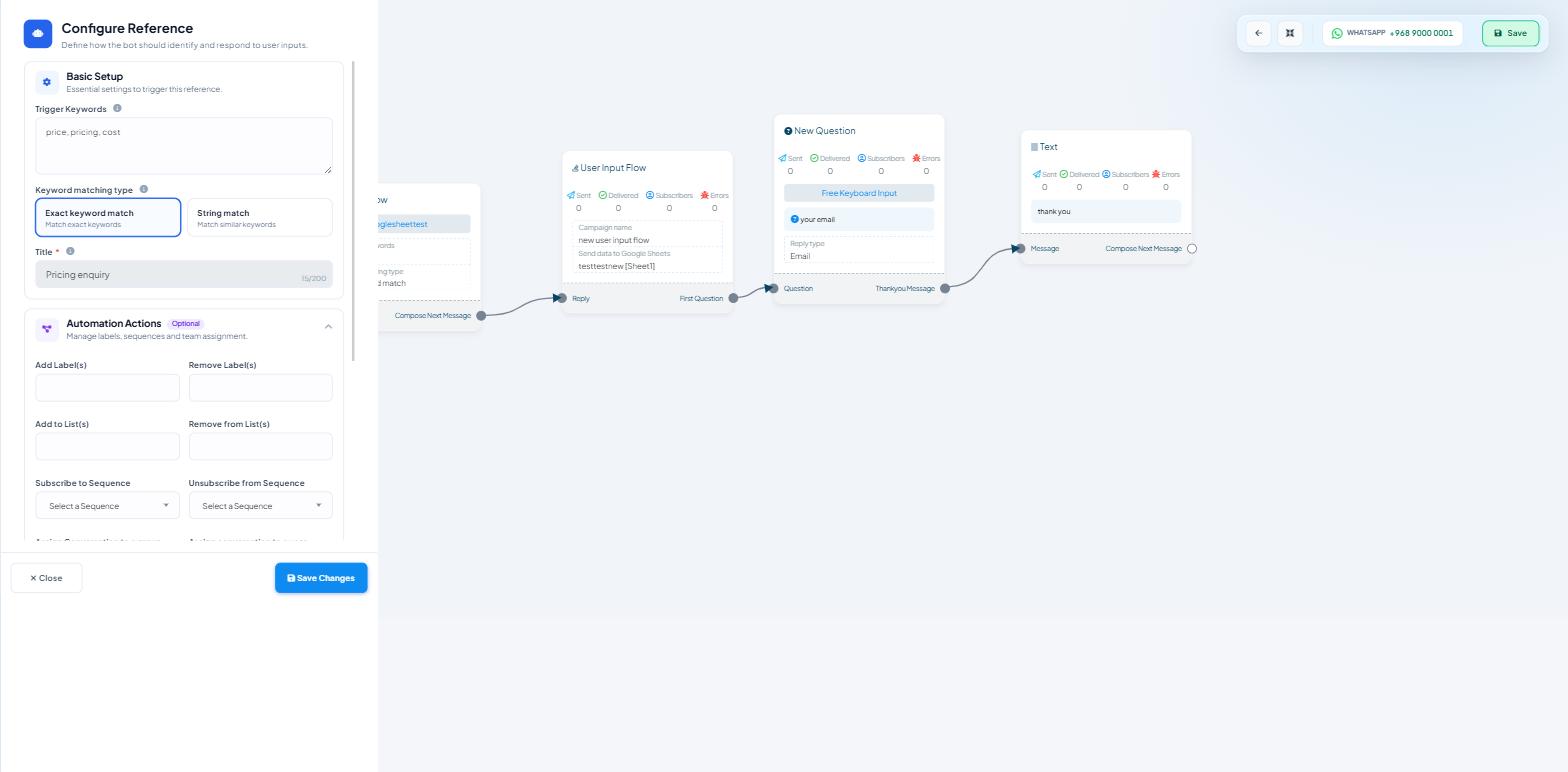
Double-click the Start Bot Flow node. The Configure Reference panel opens — "Define how the bot should identify and respond to user inputs."
Under Basic Setup:
Trigger Keywords — a textarea, placeholder "Hello, Hi, Start". Enter the words a customer would actually type.
catalog,catalogue,products,menu,shop— put in the spellings you expect, not just the one you prefer.Keyword matching type — two cards, Exact keyword match ("Match exact keywords") and String match ("Match similar keywords"). For a shopping trigger, String match is usually the right call: someone typing "do you have a catalogue?" should still land here.
Title * — the reference title, up to 200 characters. This is your internal name.
The optional Automation Actions section is worth a moment. Add Label(s) here tags everyone who asks to see products, which gives you a segment to broadcast to later. It costs one field now and saves you rebuilding the audience from order records afterwards.
Click Save Changes.
Step 2: Add the Interactive block
Drag Interactive from the INTERACTIVE group of the Flow blocks palette onto the canvas, or drag a connector out of Compose Next Message and pick Interactive from the block menu that appears. Connect Compose Next Message to the Interactive node's Reply input.
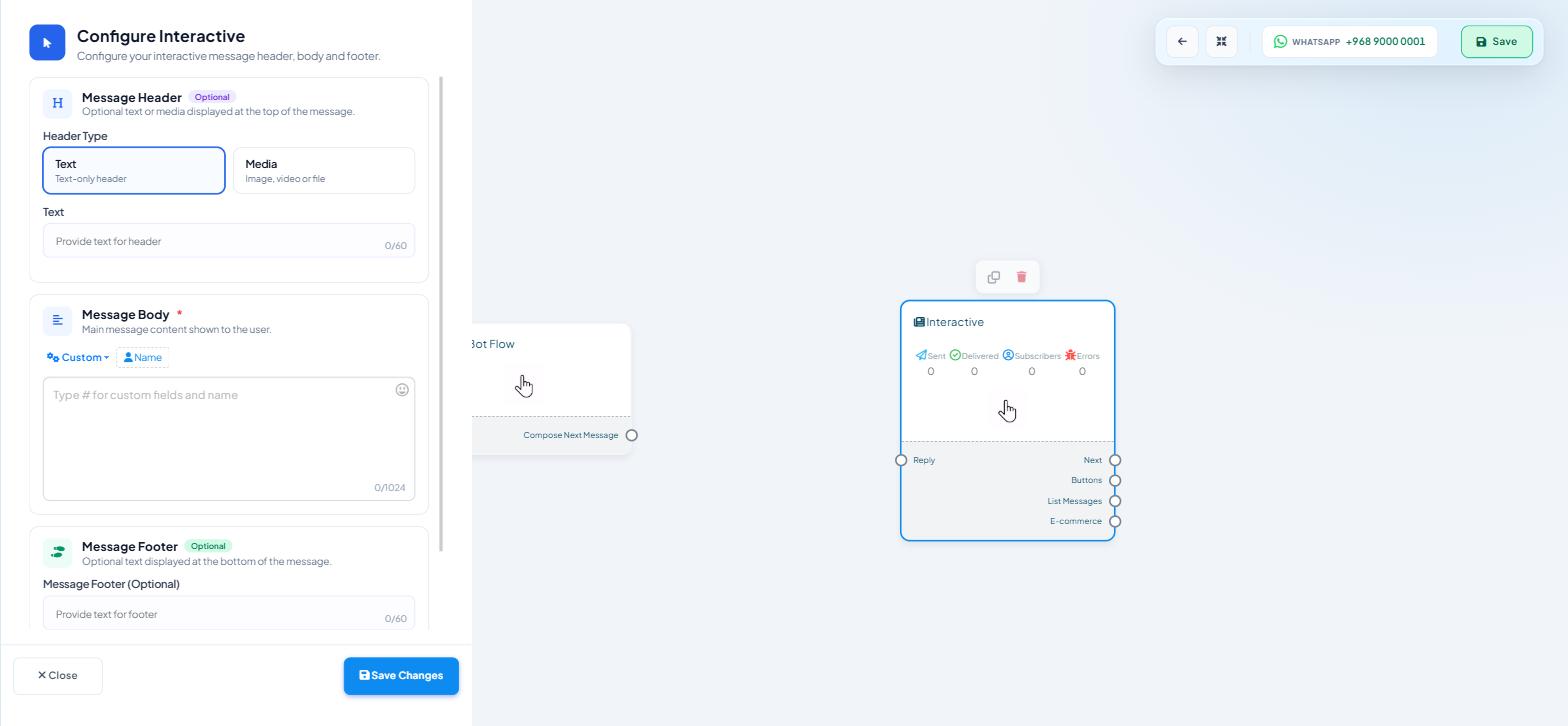
Double-click the node to open Configure Interactive — "Configure your interactive message header, body and footer."
Message Header (Optional) — "Optional text or media displayed at the top of the message." Header Type is Text ("Text-only header") or Media ("Image, video or file"). Text headers cap at 60 characters, so treat it as a label rather than a sentence: "Our current range", not an introduction.
Message Body * — the main text, up to 1024 characters. The toolbar carries Custom and Name insert buttons and an emoji picker, and the placeholder reads "Type # for custom fields and name". Note that is a single hash. Keep the body short; it sits above the products and its only job is to explain what the customer is about to see and what to do next.
Message Footer (Optional) — another 60 characters. Good place for the thing customers ask next: delivery timing, minimum order, opening hours.
Delivery Options (Optional) — collapsed by default. Delay in reply and Typing on display, with sliders for Hours 0–23, Minutes 0–59 and Sec 0–59. A one or two second delay before a product message reads better than an instant wall of items.
Click Save Changes.
Step 3: Attach products to the E-commerce port
The node has one input (Reply) and four outputs: Next, Buttons, List Messages, E-commerce.
The E-commerce port is the one that carries catalogue products; Buttons and List Messages carry the tap-to-reply options.
Drag a connector out of the E-commerce port.
Choose the products you want to send in the panel that opens, and save it.
The products hang off the node's E-commerce port; the message wording stays in the drawer.
Step 4: Save and test the whole path
Click Save on the canvas toolbar, then message the bot from a different phone and walk the whole route as a customer would:
Send the trigger keyword. The interactive message should arrive with your header, body and footer.
Open the products and pick an item.
Go to the cart and place the order.
Follow the purchase step through to the end.
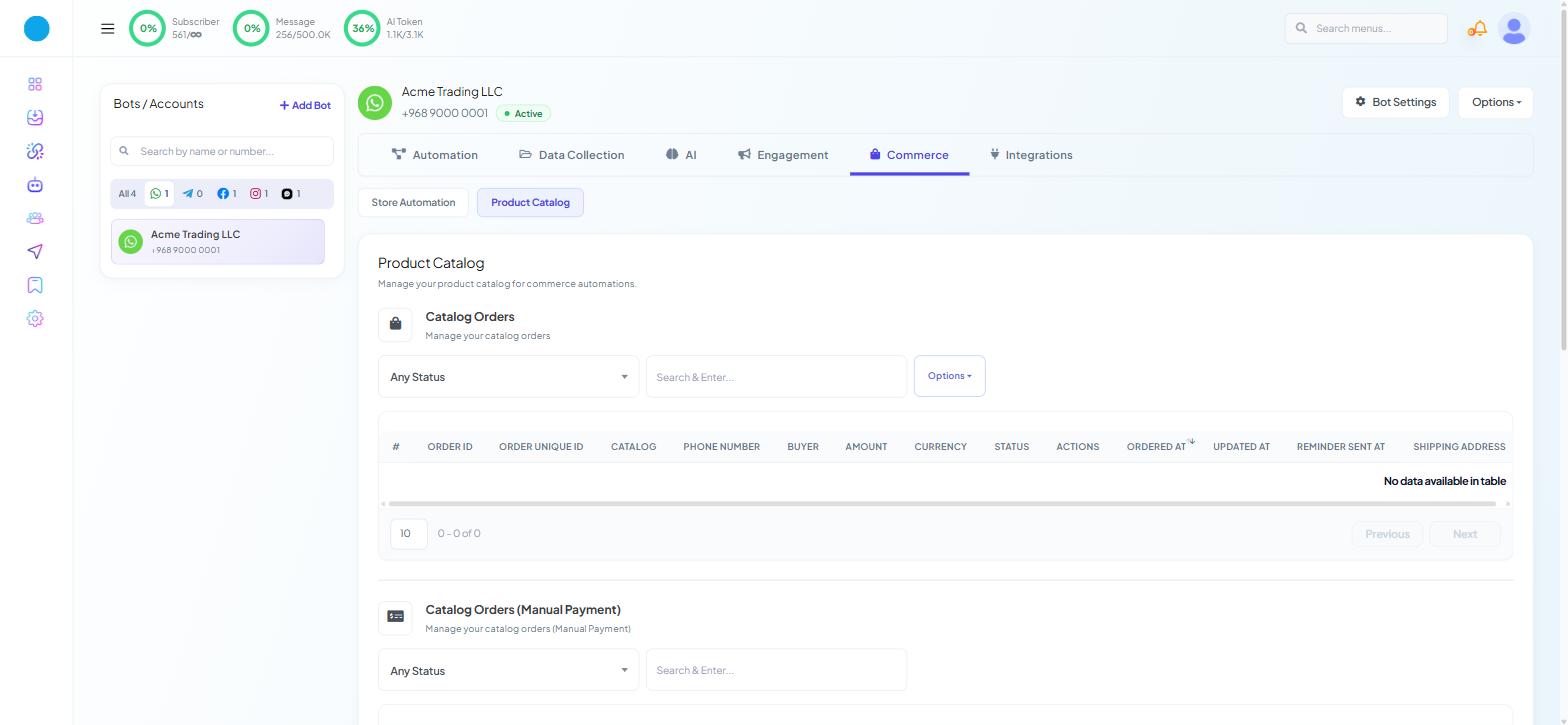
Then check Commerce → Product Catalog → Catalog Orders. A completed test order should appear as a row with ORDER ID, BUYER, AMOUNT, CURRENCY and STATUS populated. SHIPPING ADDRESS fills only where the buyer was asked to confirm a delivery location, so it stays blank for a digital product and a blank one there is not a fault. If the products displayed but no order row exists, the break is in order handling rather than in this flow.
What to build around it
The product message is rarely the whole conversation. Three additions that earn their place:
A follow-up after the order. Automation → Quick Actions carries system cards for Confirm Order ("Send order confirmation messages.") and Cancel Order ("Send order cancellation messages."). Each opens its own flow in the Flow Builder, so the message a buyer gets after ordering is yours to write.
A question before the products. Put a User Input Flow or a Condition block ahead of the Interactive block and branch — a customer who says "gifts" and one who says "spare parts" should not get the same six items.
A template for cold contacts. To message people who have not messaged you first, create a Carousel Product Template under Automation → Message Templates → Create.
When it does not work
The keyword does nothing. Check the flow saved, and check no other keyword reply claims the same word. Exact keyword match is unforgiving about punctuation and extra words.
The message arrives but with no products. The E-commerce side of the node is not configured, or the catalogue is not attached to the WhatsApp Business Account on Meta's side.
Products show with wrong prices. Product data comes from the Meta catalogue at send time. Fix it in Commerce Manager.
Nothing works on a second bot. Flows belong to one bot. Rebuild or duplicate it against the other number.
What to do next
Once orders arrive, decide how they get handled: Cash on Delivery & Online Payments in Chat covers the order tables and the confirmation path, and Sending Catalog Purchase Data to Google Sheets gets the order data out to whoever packs the boxes.