
Live Chat Translation: Answering Customers in Their Own Language
Translate incoming messages in place and translate your own reply before you send it. Set LIVECHAT TRANSLATION LANGUAGE on your account, then use the Choose Target Language modal in the composer.
Translation is built into the Shared Inbox in two directions. You can translate a message the customer sent so you can read it, and you can translate your reply before it goes out. Both happen inside the conversation, and you always press send yourself.
Set your translation language first
Translation needs to know what to translate into. That is an account setting, not an inbox one.
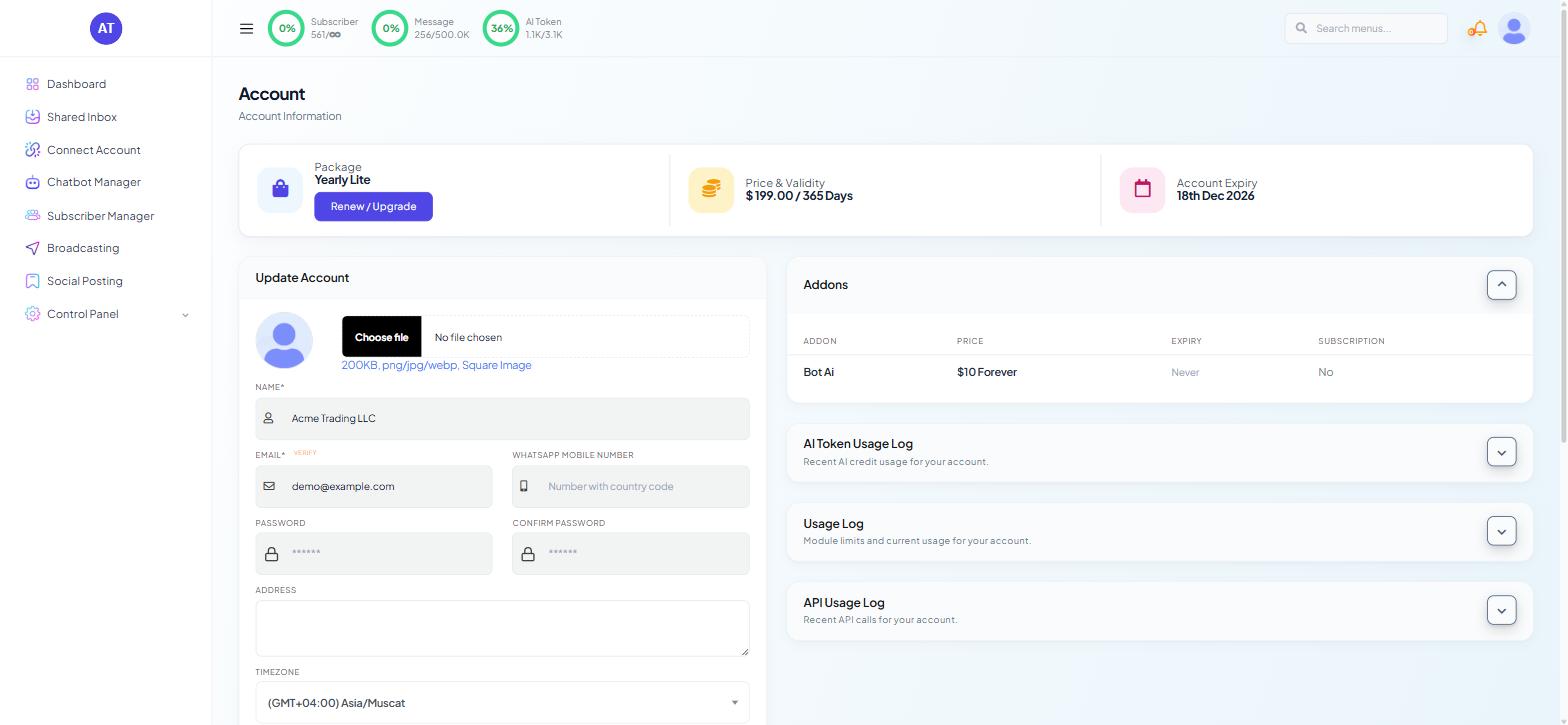
Open the profile menu at the top right and choose Account.
In the Update Account form, find LIVECHAT TRANSLATION LANGUAGE and choose your working language.
Click Update.
This sits next to, and is separate from, APPLICATION LANGUAGE. Application language changes the interface; translation language changes what incoming messages are turned into. An agent who reads the interface in English but works a Spanish-speaking queue wants different values in the two fields.
This is per agent. Each person on the team sets their own.
Translating what the customer wrote
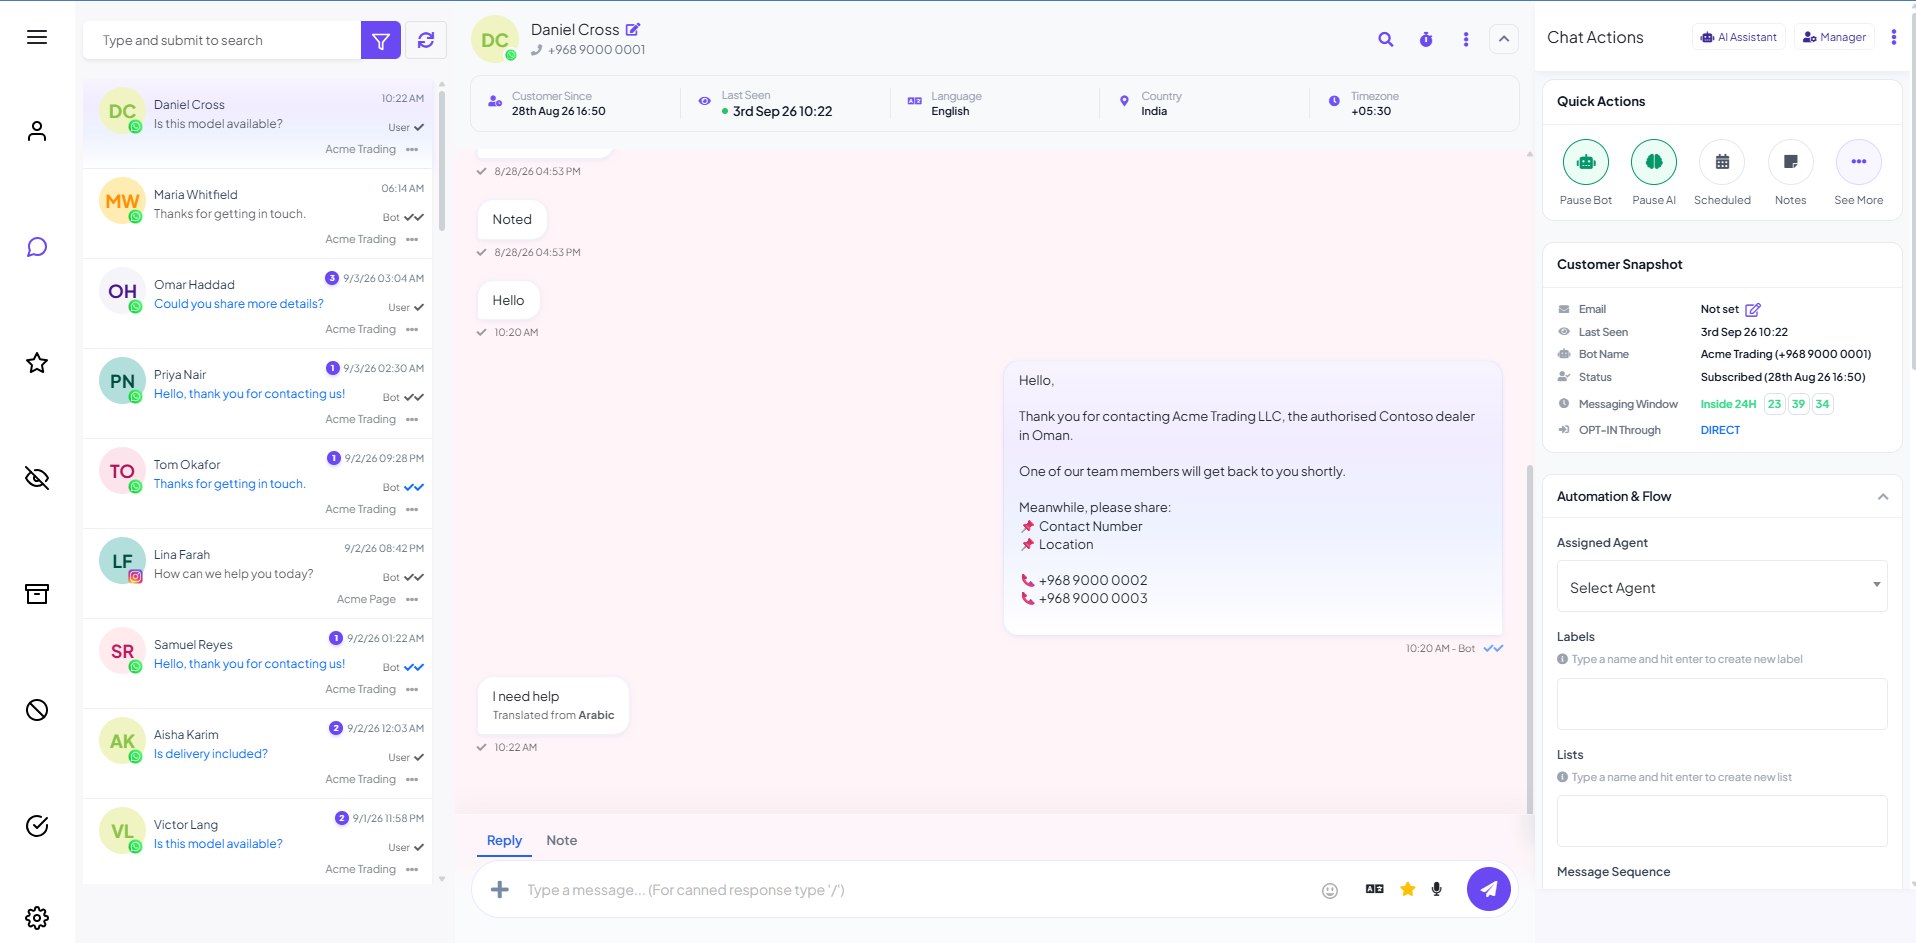
Hover over an incoming message in the thread. Three small actions appear on the bubble: reply, translate — its tooltip reads Translate it — and a react control.
Click the translate icon and the message is replaced in place by its translation, with an attribution line underneath reading "Translated from Arabic", naming the source language in bold. The timestamp does not change, and the attribution stays visible so nobody reading the thread later mistakes a machine translation for the customer's own words.
The Language field in the contact strip above the conversation — alongside Customer Since, Last Seen, Country and Timezone — usually agrees with it, and is the faster place to look when you are deciding how to open.
Translating your reply
Write your reply in your own language in the message field — "Type a message... (For canned response type '/')".
Select the text you want translated.
Click the translate icon in the composer icon row, between the emoji and star icons. Its tooltip reads Translate.
A Choose Target Language modal opens over a dimmed page, with a single language dropdown. Pick the customer's language.
Click Translate. Cancel backs out without changing anything.
Your draft is replaced by the translated version in the composer, and a green Success toast confirms "Message translated successfully." Read the translated text before you press send.
Getting better results
Write short, complete sentences. Fragments translate badly.
Avoid idiom. "I will check and reply today" survives translation; "let me chase that up" does not.
Check names, order numbers and product codes after translating.
Do not translate a canned response you have not read.
Who can use it
LIVE CHAT - TRANSLATOR is its own toggle in the permission list under Control Panel → User Permission, separate from the general LIVE CHAT permission.
If translation icons are missing for one agent and present for another, that toggle on their role is the first thing to check. See Adding Team Members & Access Control.
Translation and the AI panel
Use Translate for language; use the AI panel only when the wording itself needs help (it uses AI tokens). See AI in the Shared Inbox.
What to do next
Account Preferences & Personalisation covers the rest of the account form, including timezone and application language. For the whole inbox, see Live Chat and the Shared Inbox: Complete Overview.