
Connecting a Custom SMS Gateway (HTTP GET and POST)
For technical users: add any SMS provider to Scope Wiser by calling its HTTP endpoint — a single URL for GET, or a base URL plus mapped parameters for POST — and test it before you rely on it.
For technical users. If your provider is Twilio, Vonage or Africa's Talking, use SMS Gateways: Twilio, Vonage and Africa's Talking instead.
Scope Wiser can call any SMS provider's HTTP send endpoint. You supply the request; Scope Wiser fills in the recipient's number and the message text at send time.
Which method to use
Your provider's documentation decides this.
HTTP GET puts everything in the URL as query parameters. If the documentation shows a single long URL with ? and & in it, you want GET.
HTTP POST sends the values in a request body as named parameters. If the documentation shows a table of body parameters and an endpoint with no query string, you want POST.
One thing rules out both: authentication in a request header. Neither method exposes a header field, so a provider that requires Authorization: Bearer … cannot be connected this way. Providers that accept the key as a URL or body parameter are fine.
Before you start
Get three things from your provider's documentation:
The send endpoint — the exact URL, including whether it is
https.The parameter names — what the provider calls the recipient field and the message field. There is no standard:
to,msisdn,phone,mobileanddestinationare all in use.How the API key is passed — as a query or body parameter, and under what name.
Confirm the endpoint works before you bring it into Scope Wiser. Paste it into a browser or run it from a terminal with your own number in it. A gateway that fails a manual test will fail here too.
Where custom gateways are added
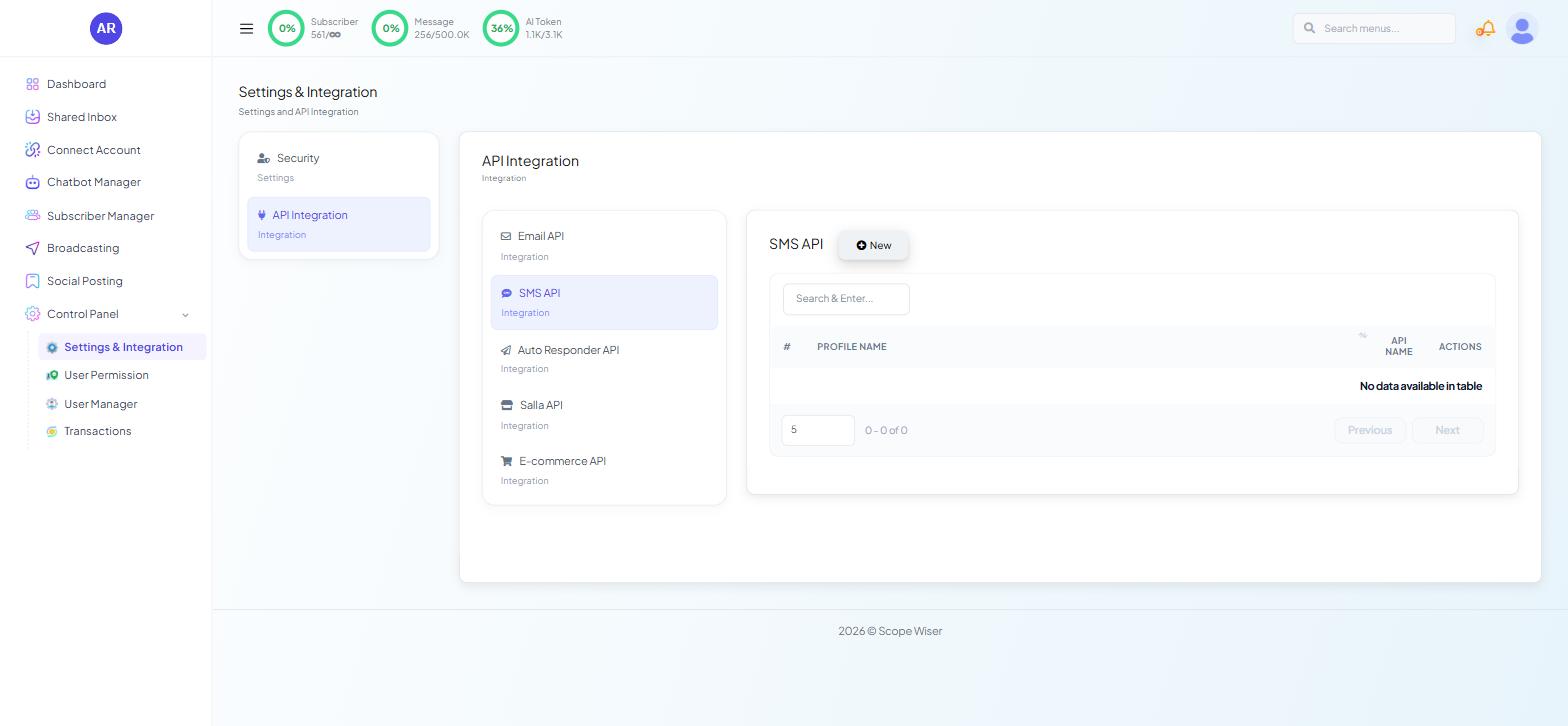
From the sidebar, open Control Panel → Settings & Integration.
Choose the API Integration card, then SMS API from the list.
Click New. The drawer's provider picker lists the HTTP GET and HTTP POST options alongside the named providers.
Method 1: HTTP GET
Choose the GET option and name the profile.
Paste your provider's full send URL into the URL field, with your API key and any fixed parameters already in place.
Where the recipient's number and the message text belong, put placeholders. Scope Wiser substitutes the real values at send time.
A typical URL looks like this:
https://api.example.com/send?apikey=YOUR_API_KEY&sender=ACME&to=PHONE&text=MESSAGEEverything except PHONE and MESSAGE stays exactly as your provider gave it to you.
Three details cause most GET failures:
Encoding. The message text contains spaces and punctuation. Confirm with your provider whether they expect the text URL-encoded, and check what arrives on a test handset — spaces turning into
+or%20in the delivered message is the giveaway.Length. Some gateways truncate long query strings. A long message body is the first casualty.
Order. A few older gateways are fussy about parameter order. Keep the order from the documentation.
Click Analyze and test call before saving. A gateway that returns an error here will return
the same error to every campaign.
Method 2: HTTP POST
Choose the POST option and name the profile.
Enter the Base URL — your provider's endpoint with no query string, for example
https://api.example.com/v1/send.Build the request body one parameter at a time. Each parameter has three parts:
Part | What it holds |
|---|---|
Key | The parameter name your provider expects — |
Type | Where the value comes from: a fixed value, the recipient, or the message text |
Value | The literal value, used only when the type is fixed |
A typical set looks like this:
api_key— fixed — your keysender— fixed —ACMEto— recipient — filled in per messagemessage— message text — filled in per message
Add one row per parameter your provider's documentation lists as required. A missing required parameter usually produces a generic error rather than a helpful one.
Click Test response and read what comes back. The provider's response body is where
the real diagnosis is — Scope Wiser can only report that the call failed; the provider says why.
Testing properly
A saved profile is not a working one. Prove it end to end:
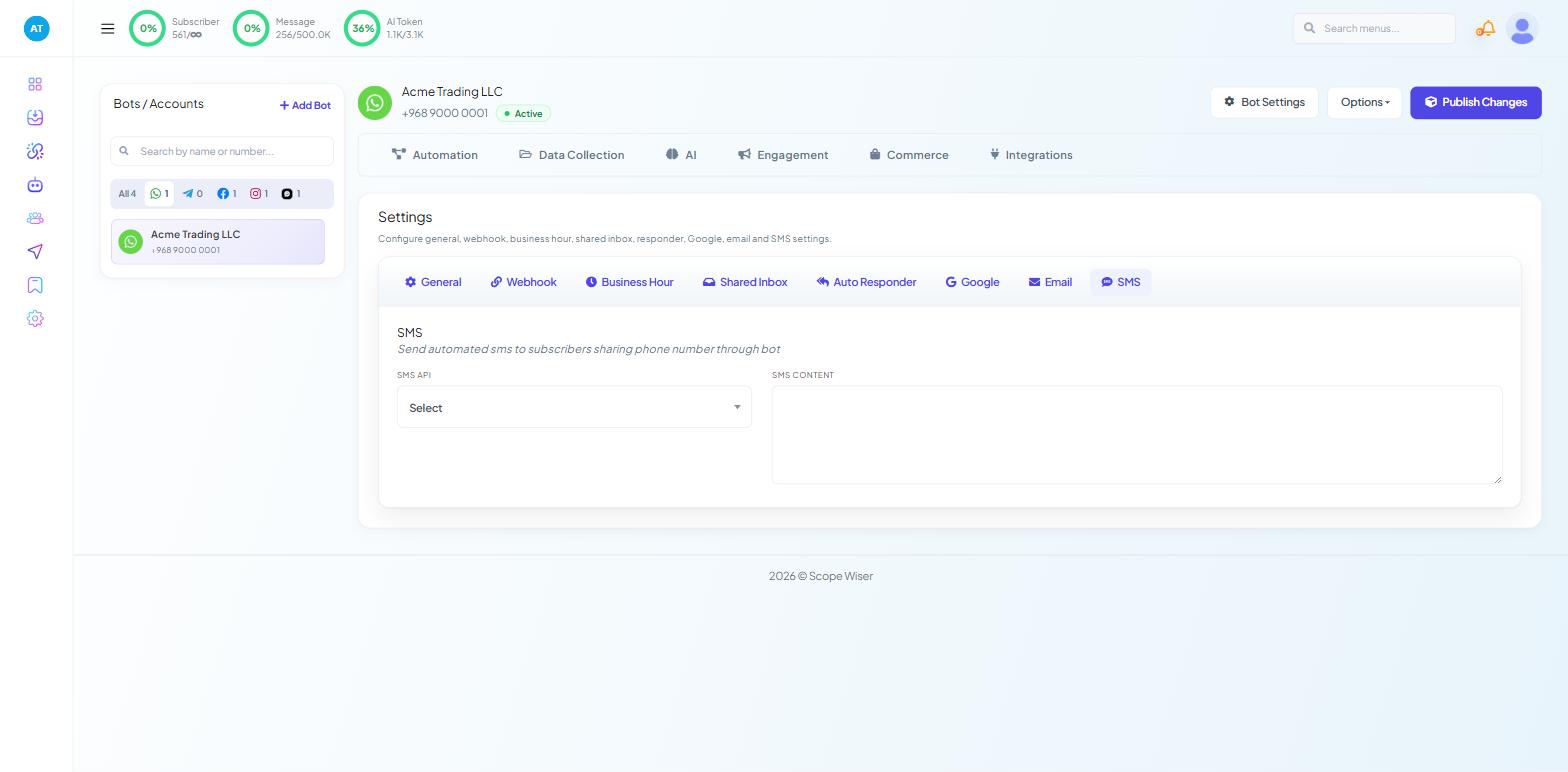
Attach the profile to a bot in Bot Settings → SMS — see SMS Marketing: Setup and Tracking, Step 2.
Trigger the bot with your own number and wait for the text.
Check the message that arrives, not just that one arrived. Encoding problems only show up in the delivered body.
Common failures
The test call succeeds and no message arrives. Your gateway accepted the request and rejected it downstream — usually an unregistered sender ID or a destination not enabled on your account. The provider's own logs will say.
Works from your desk, fails from Scope Wiser. IP allowlisting. Many regional gateways restrict API access by source IP. Ask your provider to allow the platform's outbound addresses, or to disable the restriction for this key.
Every message arrives blank or truncated. Encoding, or a message parameter mapped to the wrong key.
Intermittent failures under load. Rate limits. Most gateways cap requests per second and silently drop the excess.
Authentication rejected. If the provider's key is meant to travel in a header, this method cannot carry it. Put a small proxy in front of the gateway that adds the header and point Scope Wiser at the proxy, or ask your provider for a key that can be sent as a URL parameter.
What to do next
Once the profile sends reliably, SMS Marketing: Setup and Tracking covers attaching it to a bot and reading delivery figures. For anything more elaborate than a plain text — a lookup, a two-way request — Calling External APIs From a Flow describes the HTTP API block, which gives you headers, methods and response mapping.